Sometimes you just can’t afford to lose all the data you’ve been accumulating on your computer for years: your projects, documents, pictures, movies, music, and other important files. Anything can happen – hacks, malware attacks, accidental deletions or even data failures.
However, according to WorldBackupDay, 30% of us still don’t back up.
Why does this happen?
The backup process takes time and a bit of an extra effort to go through. Fortunately, it turns out it’s not very hard. Let’s take a look at which options there are to back up a hard drive.
In this piece, we’ll cover best practices to back up your hard drive both locally and externally, back up to USB and cloud, as well as the peculiarities of backup on different operating systems.
At the end of the piece, we’ll cover the TOP 5 Best Backup Software programs that the market has to offer.
What is backup
In the case of a computer backup, we are referring to copies of original files wherever they happen to be, whether on a laptop, desktop, or an external drive. Proper backup means following the 3-2-1 rule of backup, which states that there should be at least three copies of data stored on two different types of storage media plus one copy kept off-site, such as in cloud storage.
There’s a plethora of backup utilities at your disposal. However, it’s necessary to evaluate each for redundancy, security, ease of access, and sometimes, price.
Best practices
There’s no right or wrong way to do it – you can back up a hard drive using an external drive or a remote server over the Internet. However, each method has its pros and cons. Let’s outline some of them in greater detail below.
Back up a hard drive locally
There’s already a pretty robust backup system that’s built into the two most popular consumer operating systems, Mac or Windows, with instructions for Linux later in this article as well.
If you’re a Mac user, there’s a great backup tool at your fingertips called Time Machine. To open Time Machine preferences,
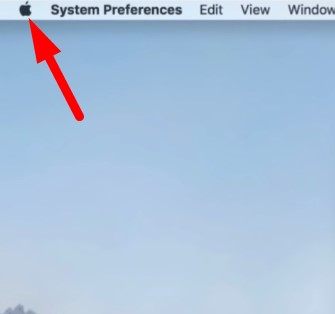
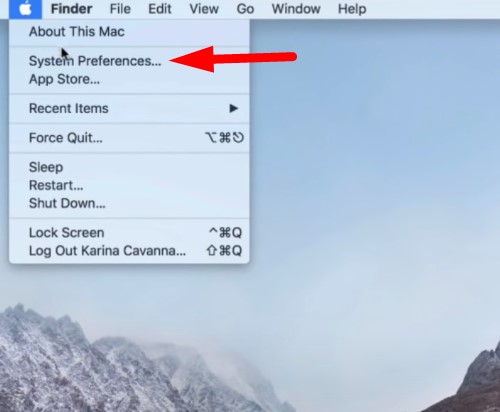
1. Сhoose Apple menu →
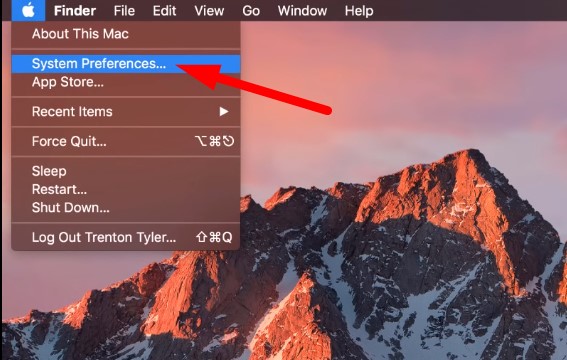
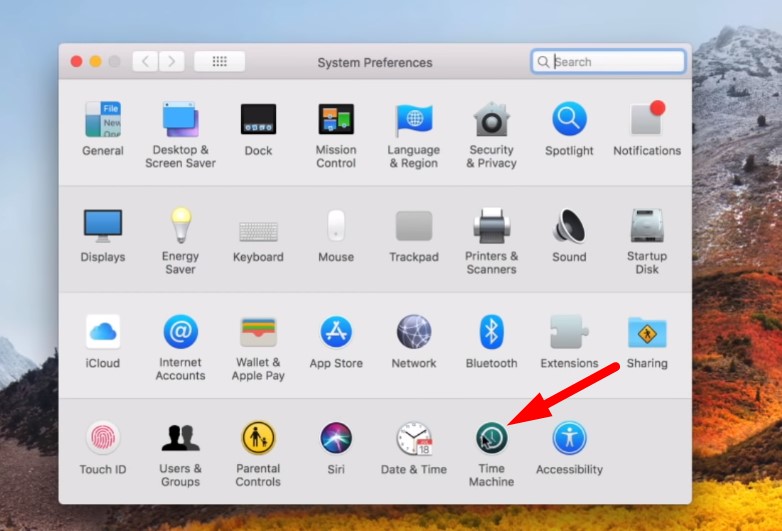
2. System Preferences → Time Machine.
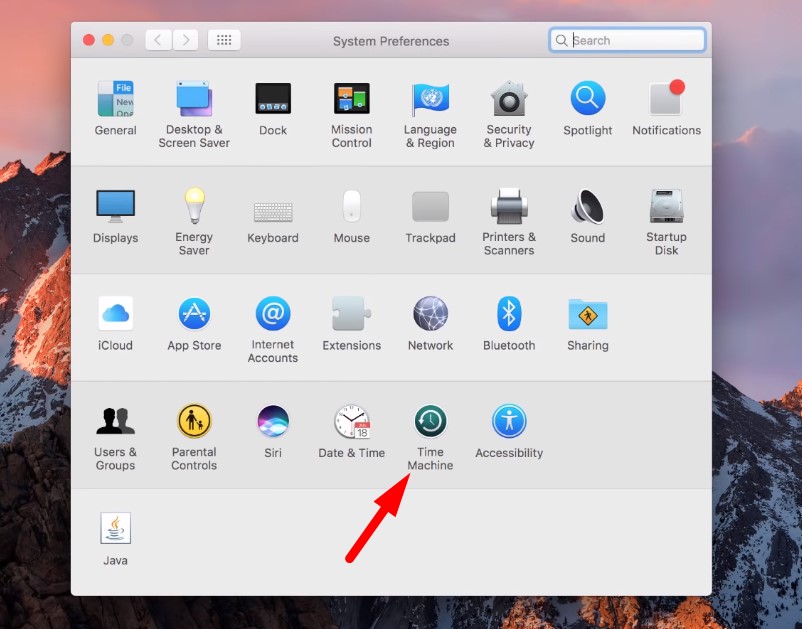
3. When Time Machine is turned on, it automatically backs up your Mac and performs hourly, daily, and weekly backups of your files.
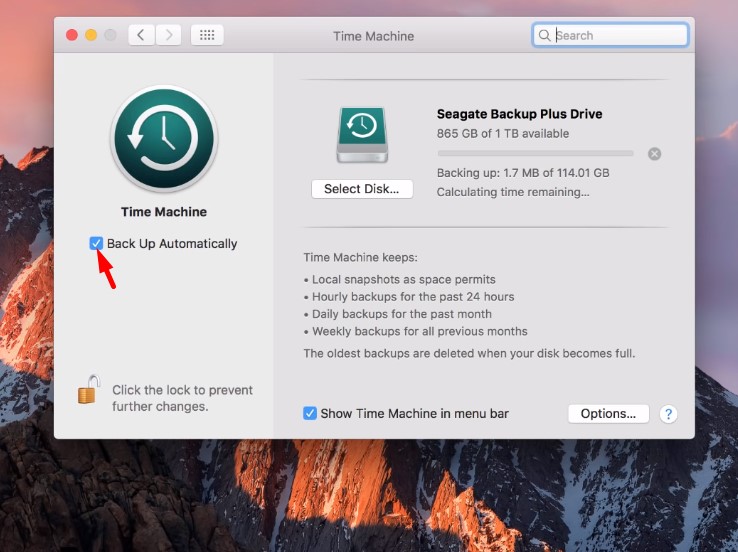
If you use Time Machine with Apple File System (APFS), your computer will not only copy everything on your backup disk but also take local snapshots of files that have changed on your local disk to recover them later, if necessary. Unless you deselect Back Up Automatically, these snapshots are taken hourly.
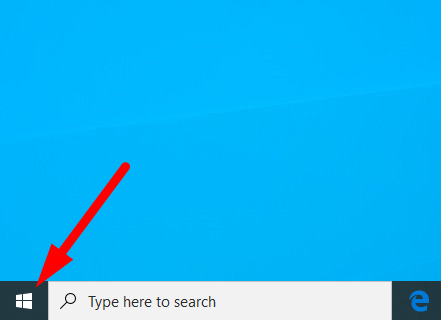
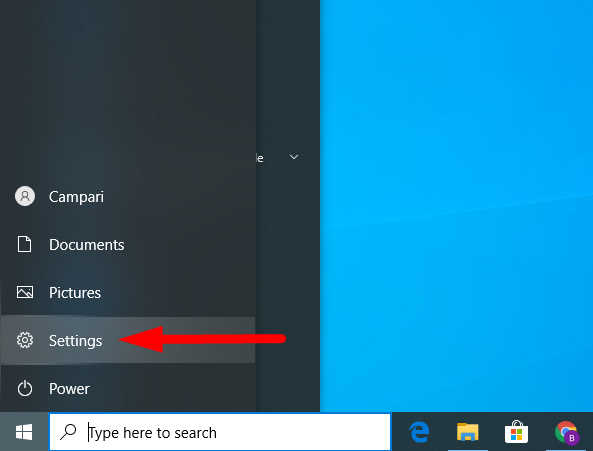
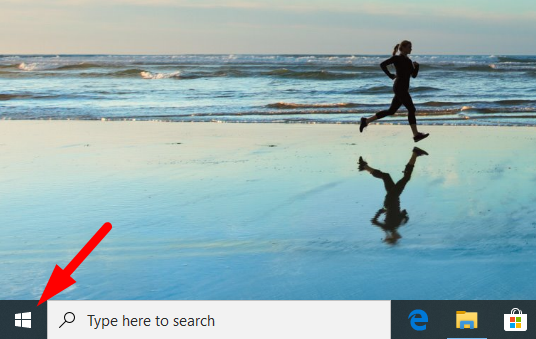
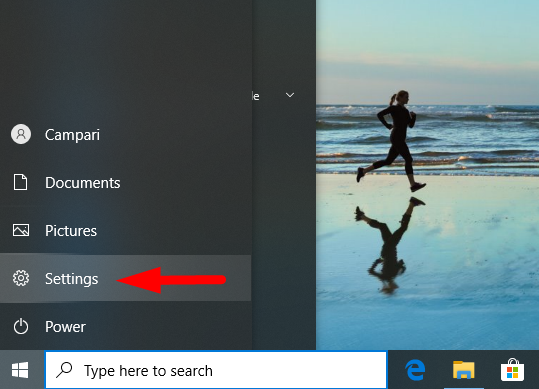
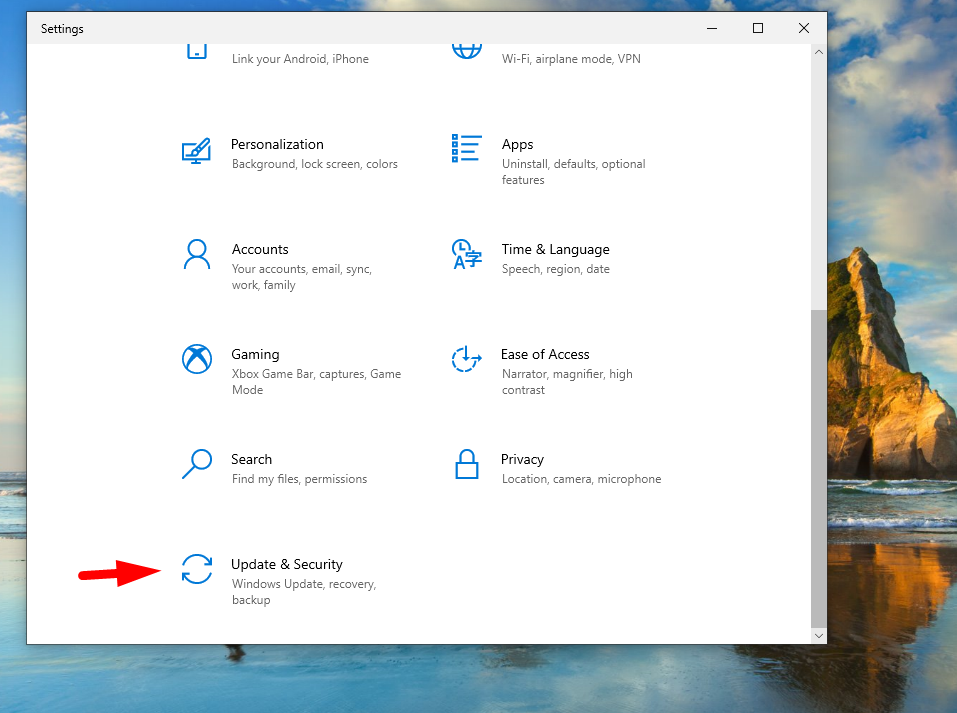
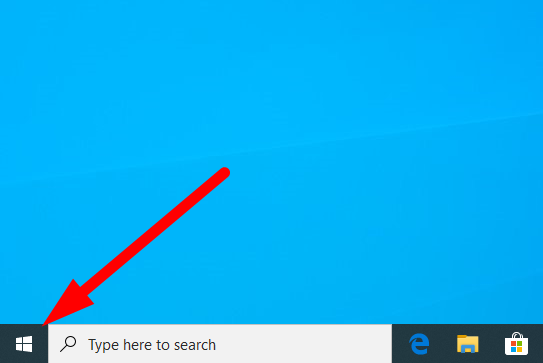
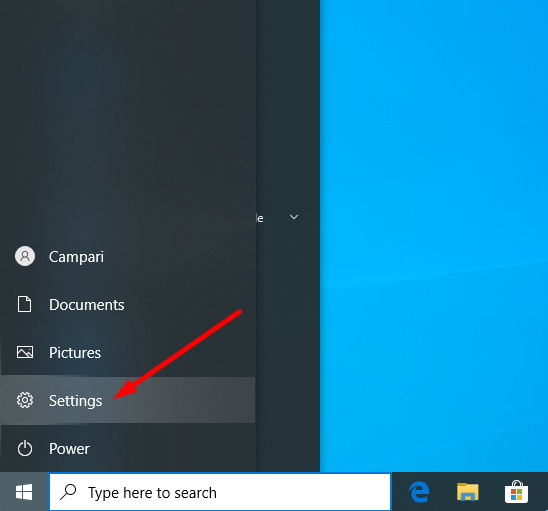
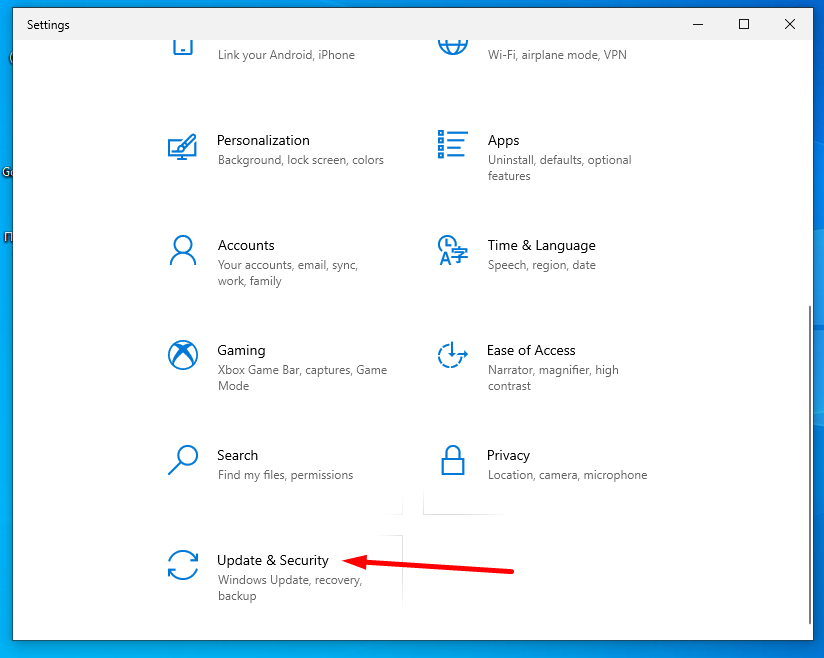
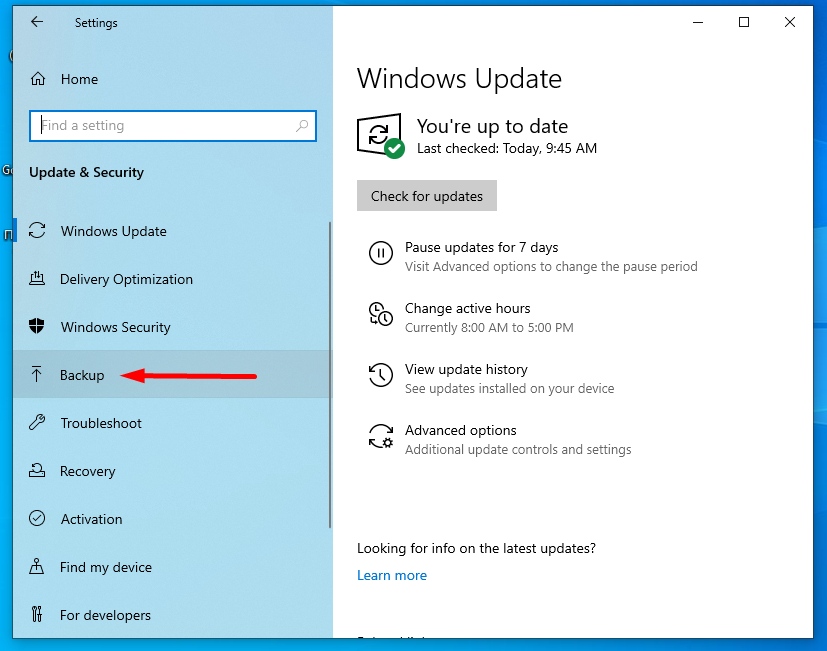
Windows 10’s integrated Backup and Restore feature can be found in Start Menu →
Settings →
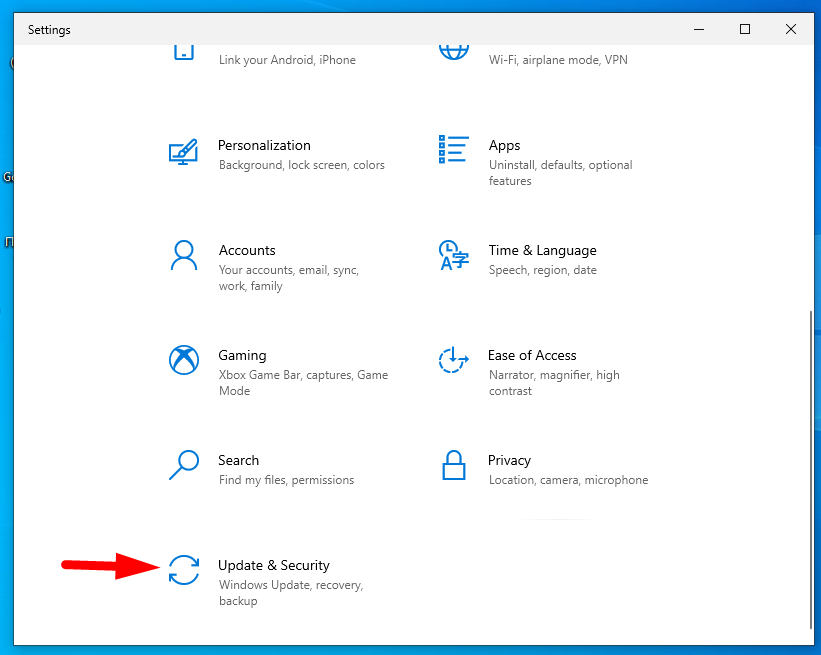
Update & Security →
Finally, hit “Backup”
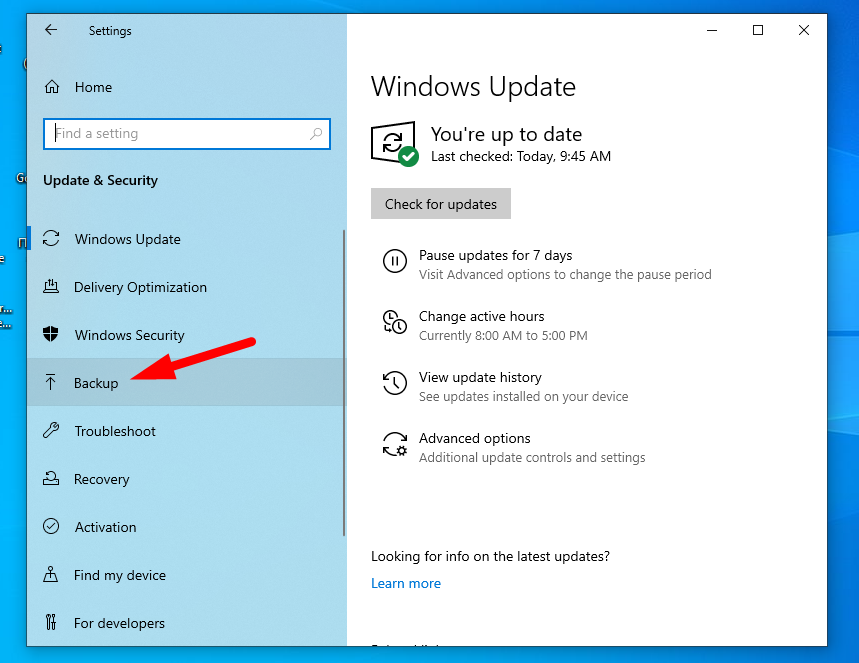
The Backup tool enables you to create a system snapshot or a repair disk in case Windows fails. A system snapshot is a full copy of your entire Windows system drive. In the event you need to restore it, will be the same as it was on the day of the backup.
Back up to an external hard drive
Let’s see how the process of backing up a hard drive externally (off-site) differs from backing up locally (on-site).
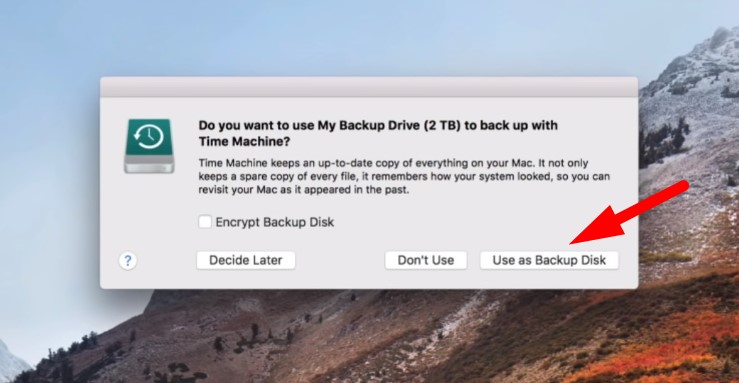
If you’re a Mac user, take an external drive, plug it in your computer, open up Time Machine, and configure it as a backup drive. Other than that, Time Machine will take care of everything on its own – all you need to do is to follow the instructions.
Use as Backup Disk →
Apple Menu→
System Preferences →
Time Machine →
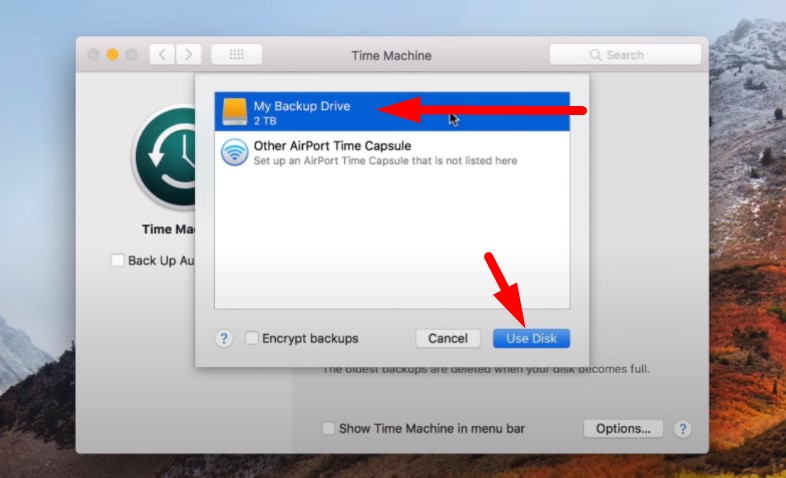
Select Backup Disk →
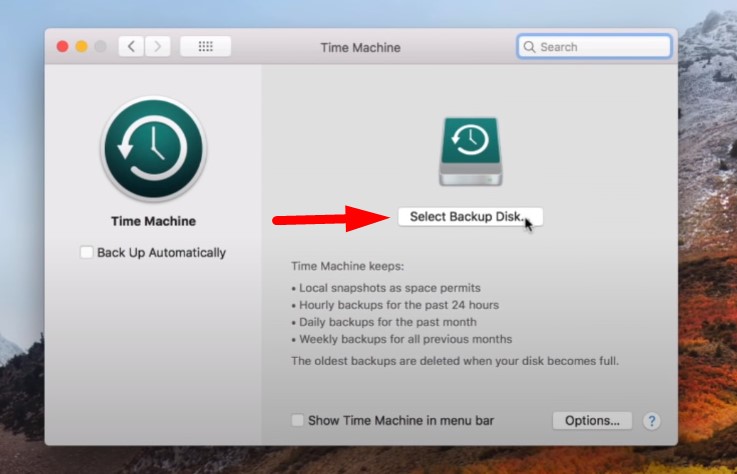
Select the disk and click “Use Disk”
In case you decide to change the machine, buy a new Mac, or reset your computer, macOS will ask you to provide a Time Machine backup to restore from.
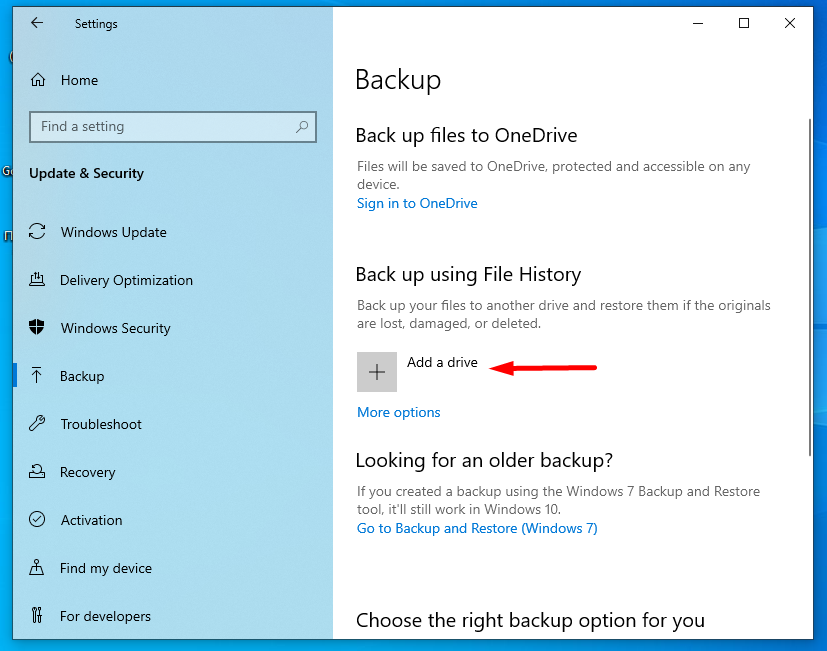
For Windows, you’ll have to navigate to File History – the same path as above:
Start Menu →
Settings
Update & Security →
Backup →
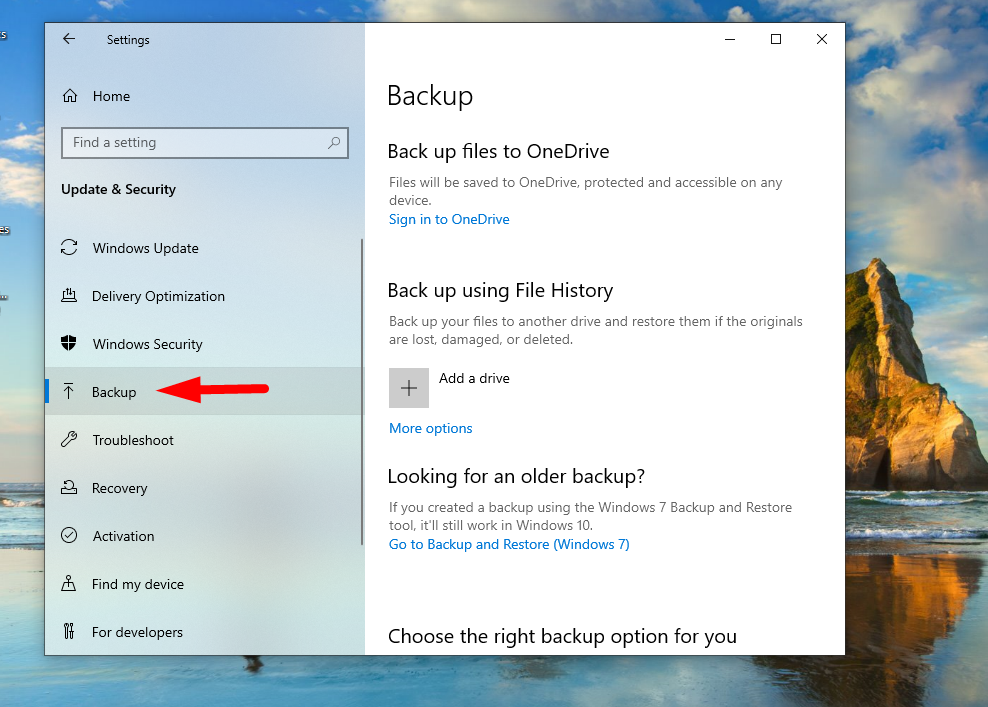
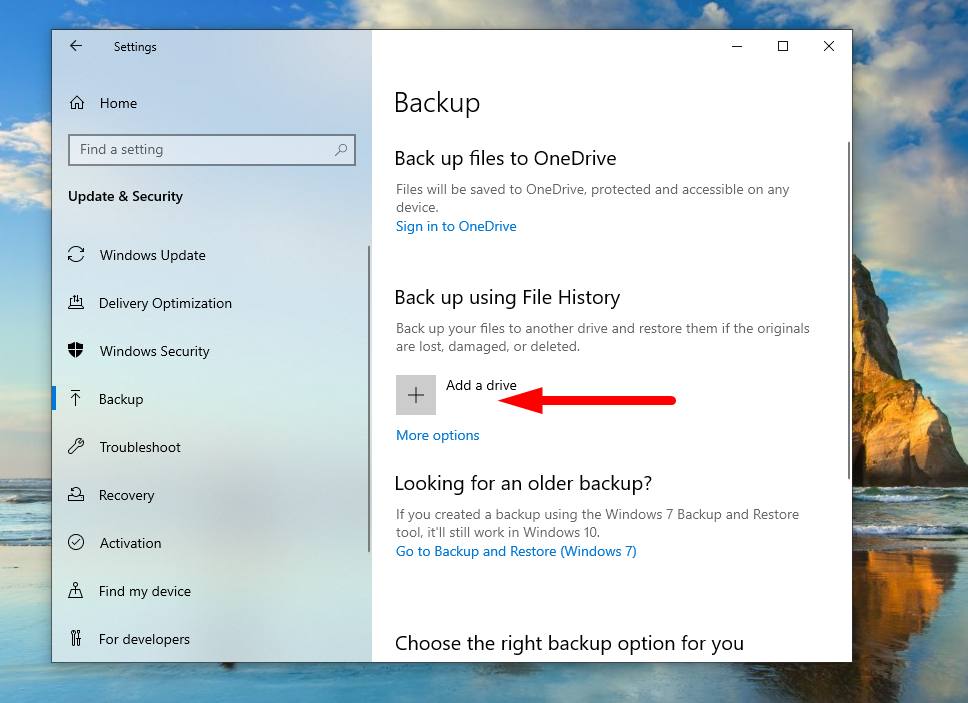
Plug in your external drive, choose specific folders to back up, and follow the instructions on-screen throughout the backup process.
Add a drive →
Add a folder →
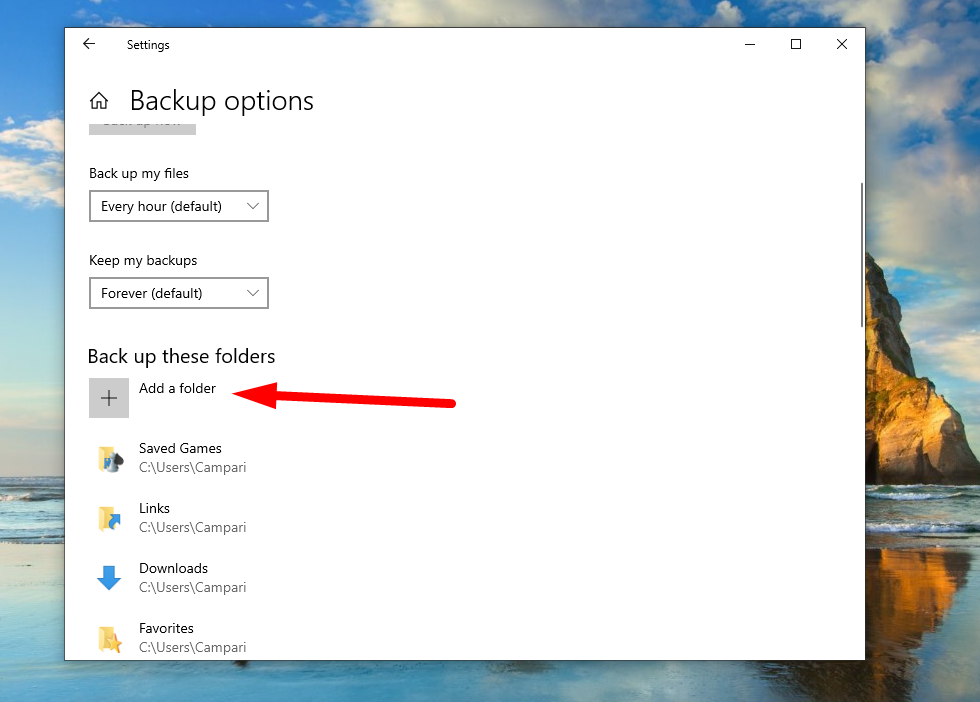
Back up now →
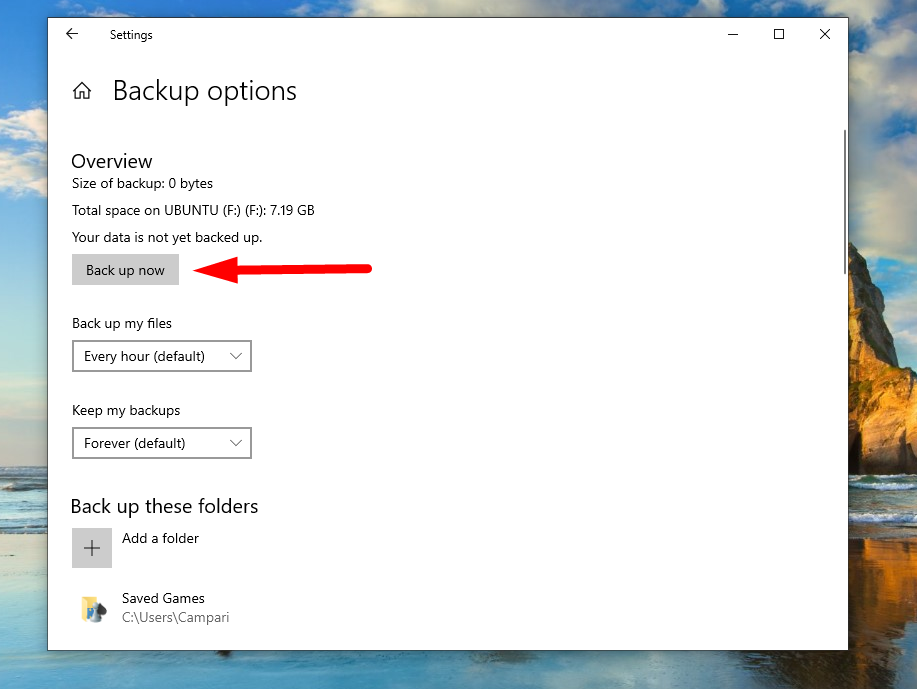
Add a folder →

Back up now →

The major disadvantage of backing up to an external hard drive is that you have to do the backups quite regularly because a backup performed once a year won’t be as valuable as once a month, a week, daily, hourly or even more regularly. The external drive can also get damaged, lost, or stolen.
Back up a hard drive to the cloud
It makes much more sense to invest in one of the many cloud storage options to back up your data, in addition to having a physical backup on a local drive.
All of the services covered below allow you to download an app that scans local folders and keep them uploaded and synchronized to the cloud.
Backing up a hard drive to cloud is a must for anyone working on more than one computer or device, as this ensures the changes on one of them will be synced with other devices.
This way, whatever happens to your computer, you can still get access to your files from anywhere.
What’s more, you can use an out-of-box backup solution or even build your own by using a comprehensive backup platform, such as Paragon’s Open Cloud Backup Platform (more on that later).
Back up to OneDrive
Microsoft OneDrive is built directly into Windows 10. Just as with any other cloud service, you can store your documents, photos, other files online and sync them across multiple devices, as well as share with other people.
To start using OneDrive, you’ll need to have a Microsoft account and choose the right storage plan for your needs.
The basic plan, which is free, allows for 5GB of space, while others start from $1.99 a month for 100GB up to $99.99 per year for a total of 1TB of space.
If you have not set up an automatic backup to OneDrive while installing Windows, you can do so by clicking the Start button and start typing “OneDrive”, or searching for OneDrive in the System Tray or in the File Explorer by following the simple path: C:\Users\[YourUsername]\AppData\Local\Microsoft\OneDrive\
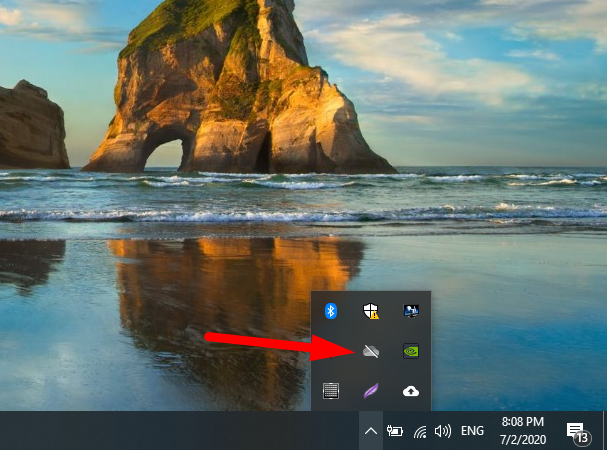
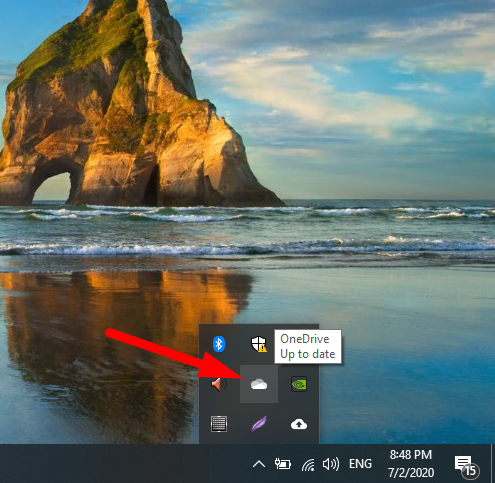
If you found OneDrive in the Start Menu, click it, otherwise in the folder OneDrive shown above, double-click the OneDrive.exe file so that the icon appears in the System Tray.

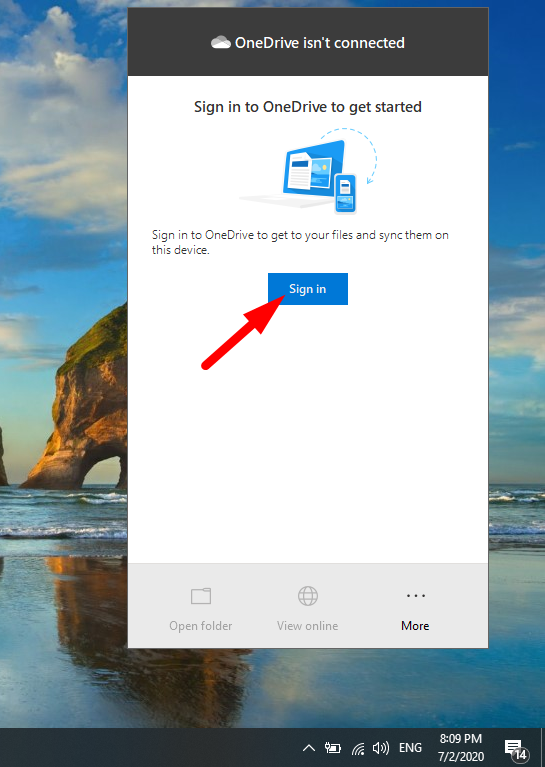
Right-click that icon, choose Settings, click the Settings tab, then check “Start OneDrive automatically when I sign in to Windows.”
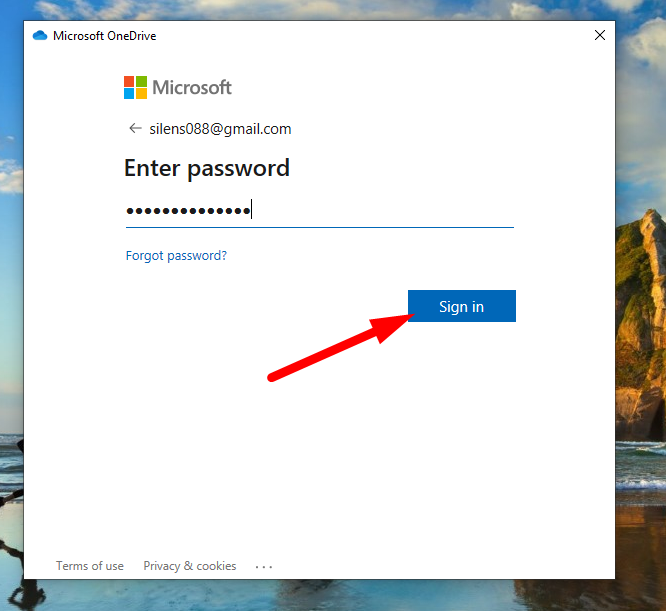
Sign in to OneDrive with your Microsoft account and confirm or change the location for your OneDrive folder.
Enter password and click sign in →
Сhange location →
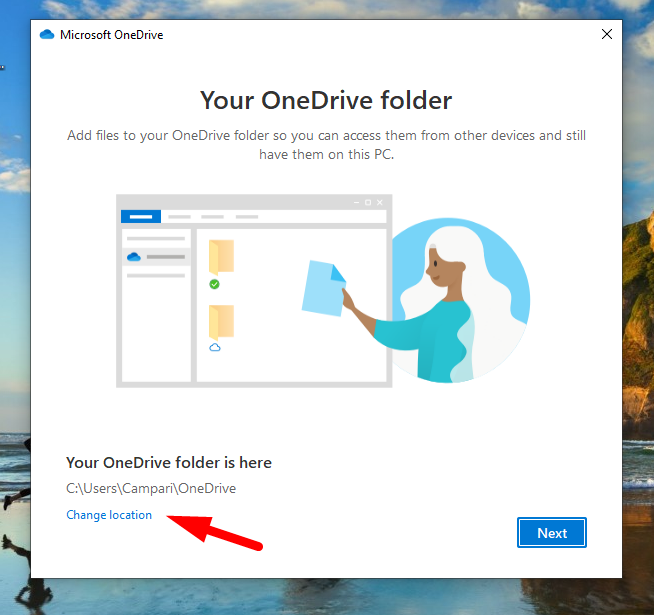
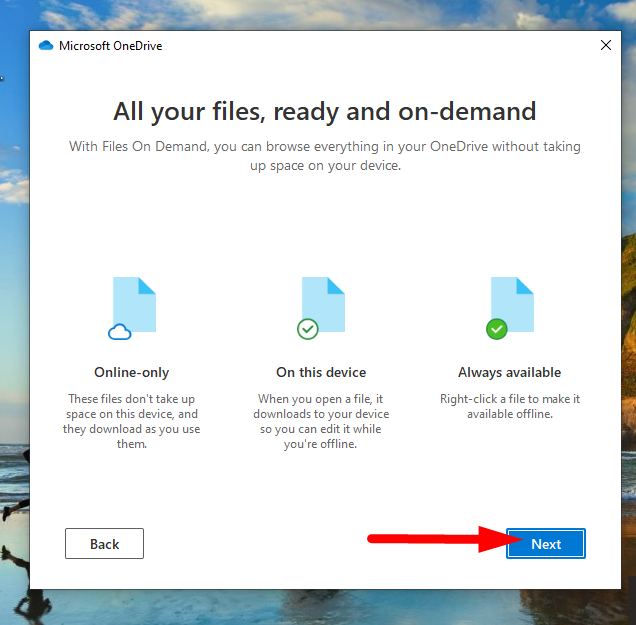
Review the instructions and then open the OneDrive folder.
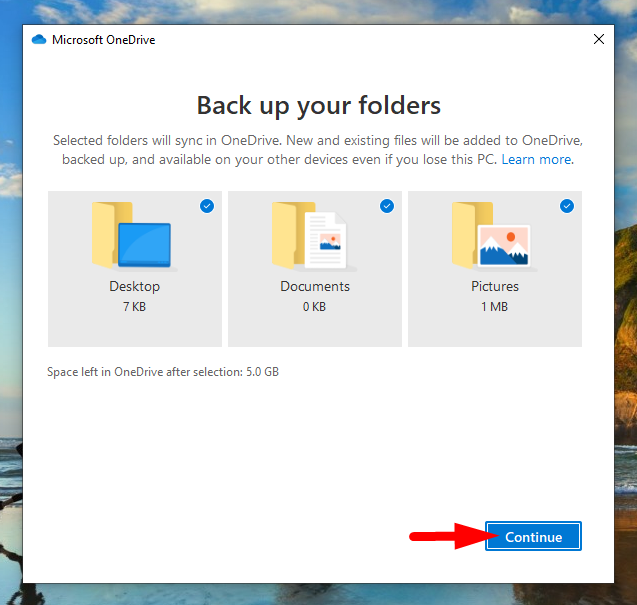
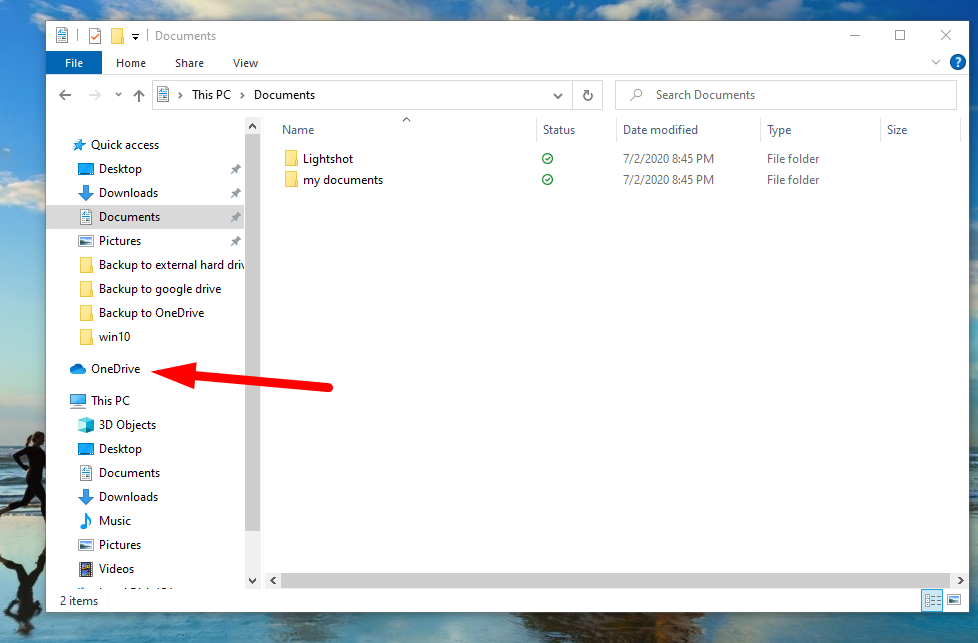
Your next step would be choosing the folders you wish to synchronize moving those entire folders into OneDrive.
Continue →
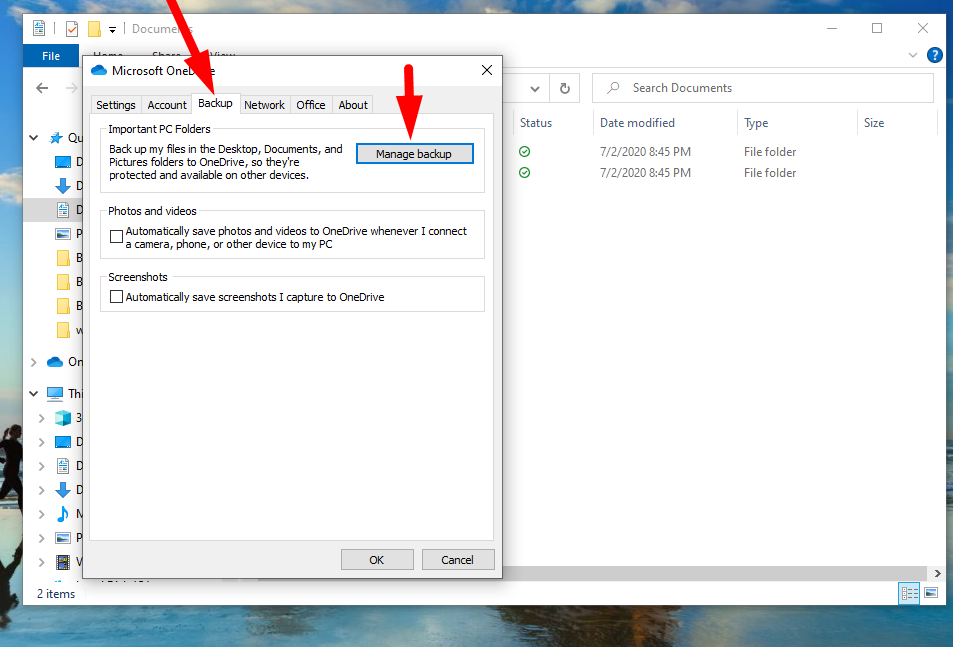
To Manage your backup, you’ll need to go to Settings again (right-click on OneDrive in the System Tray), choose the Backup tab, and Manage backup.
Next →
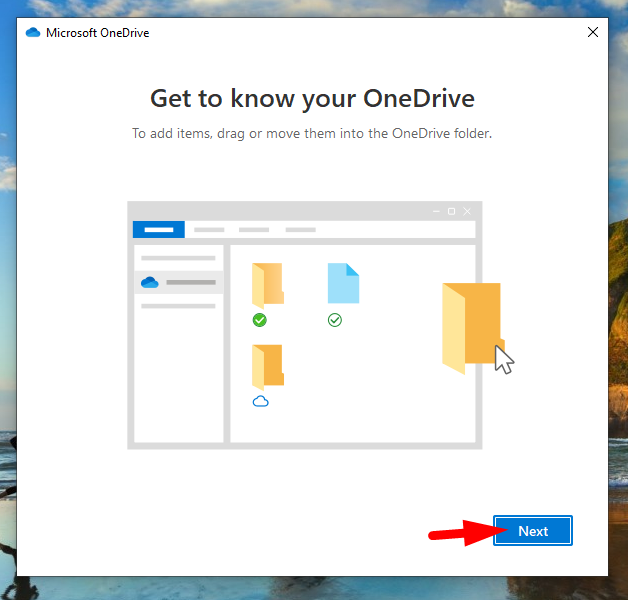
Next →
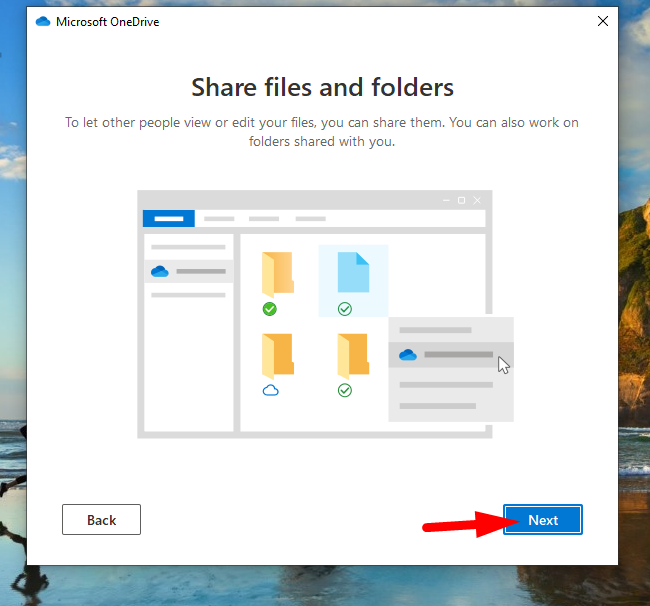
Next →
OneDrive →
Settings →
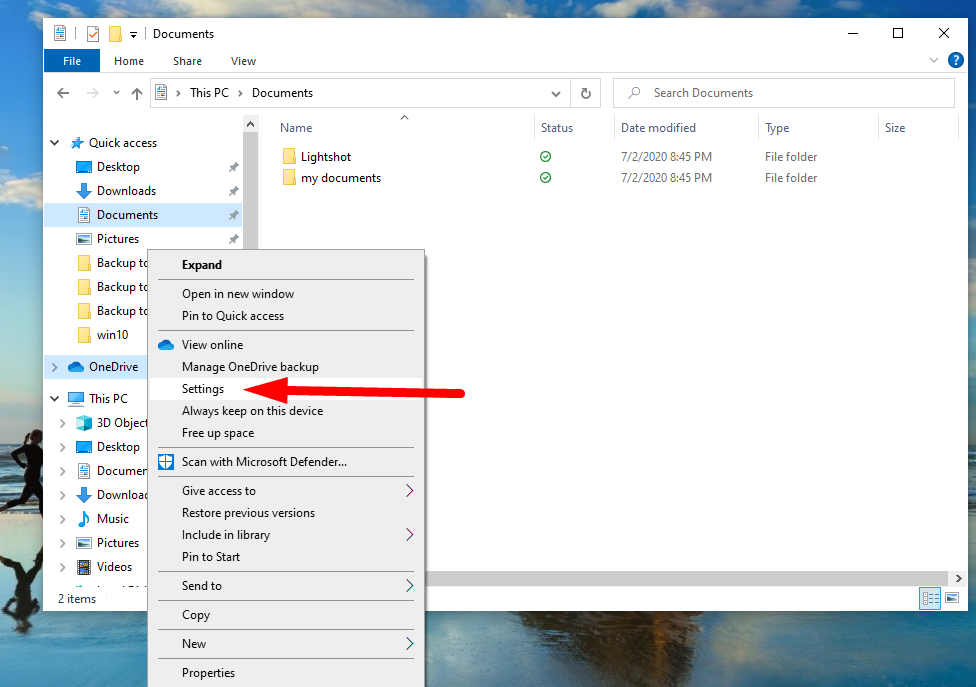
Manage backup →
Start backup →
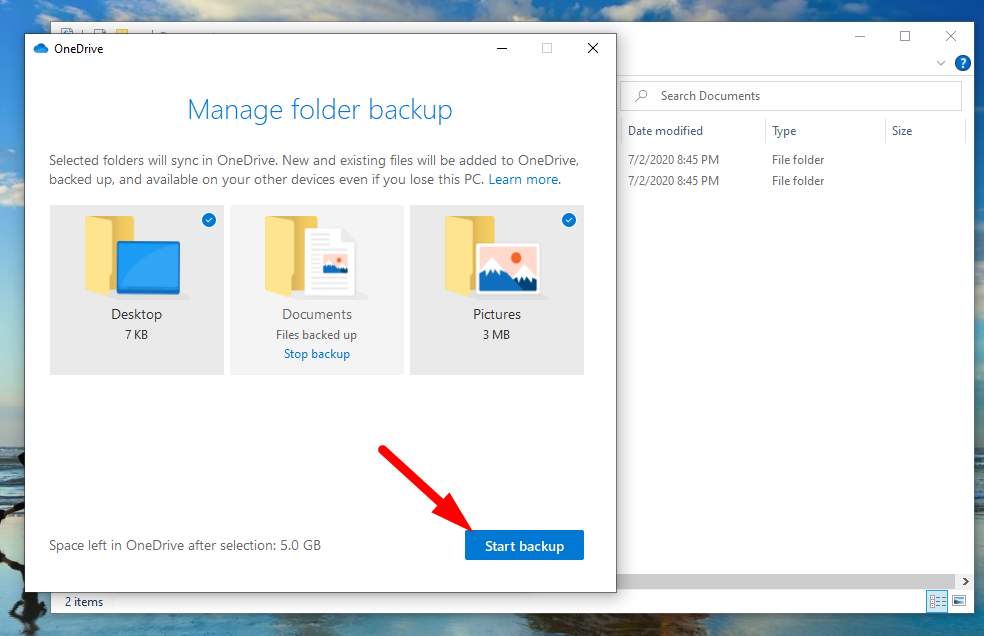
From there, you’ll be able to manage backup for documents, pictures, and desktop. In addition, you can opt for saving photos and videos to OneDrive as soon as you connect your digital camera, smartphone or tablet.
To view your files online, right-click on OneDrive in the System Tray, choose Settings → View Online.
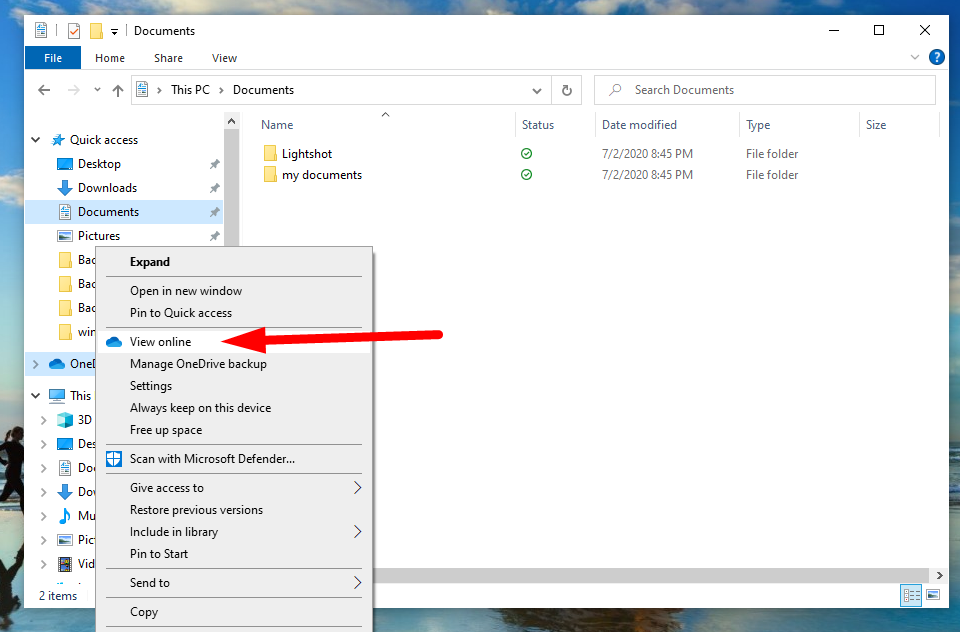
Sign in to your Microsoft Account, upon which you’ll be prompted to the page with all your files and folders currently backed up.
Back up to Dropbox
You can access Dropbox cloud services either through the web or with a desktop app.
The prices for storage vary with a free account allowing for 2GB of space. Others start from $9.99 a month for 2TB and $16.58 per month for 3TB. There used to be an unlimited plan for $25 per month but Dropbox no longer offers this.
To start using Dropbox, download the app from the Dropbox website and install it. Typically, the app creates a Dropbox folder within your Home folder on Mac or User Folder on Windows, which you’ll find in Finder or Windows Explorer listed as a Dropbox folder.
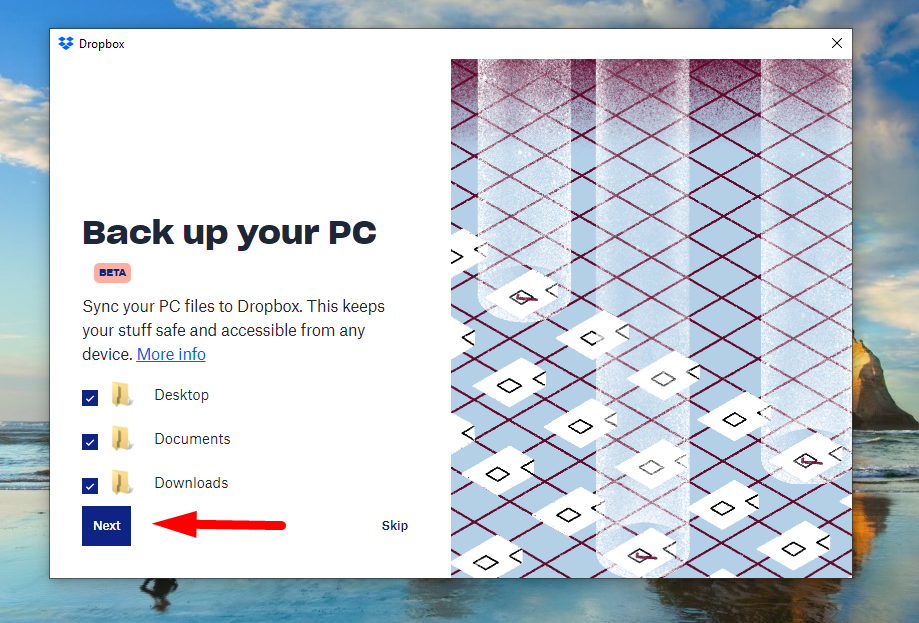
To back up a file or folder, just drag some files to this new Dropbox folder. The Dropbox app will synchronize it to your online Dropbox storage space.
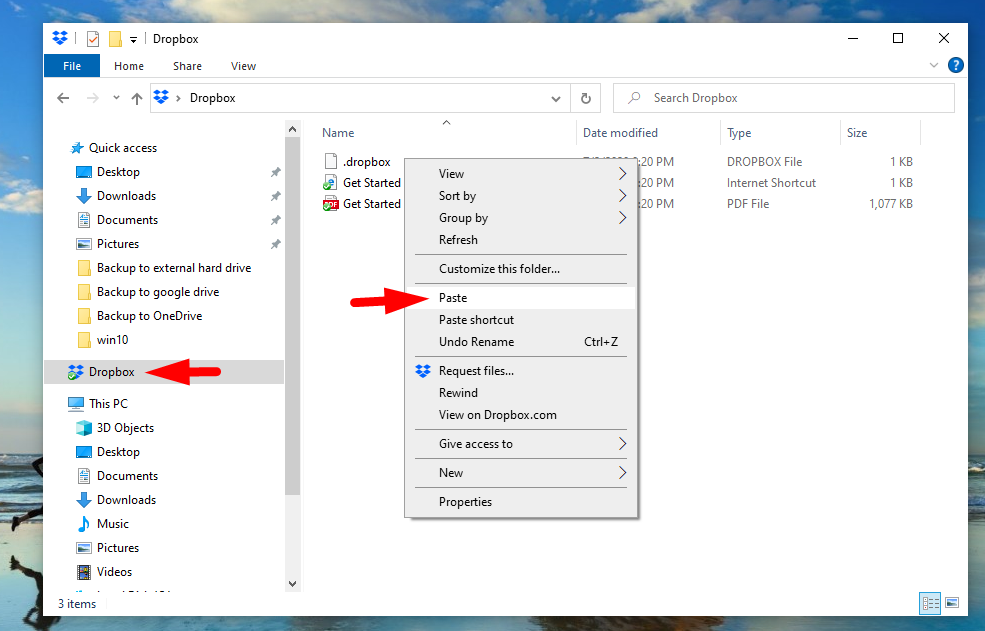
Once the file completes synching, you’ll see a green checkmark next to it. How quickly the files sync is dependent on the upload connection speed of your broadband service.
Whenever you remove a file from the Dropbox folder, it will get automatically deleted from Dropbox online, and any other device you’ve signed into with your Dropbox account. This is because Dropbox always keeps them all in sync.
Back up to Google Drive
Google’s consumer storage plans known as Google One also offer quite a few pricing plans for individuals, teams, and enterprises.
While you can get 15GB for free, there are better options available starting with 100GB at $24.99 per year, with various capacities up to 30TB for $374.99 per month.
The plans are rather flexible, allowing for customers to purchase family plans where they can add up to five members, add team members, and more.
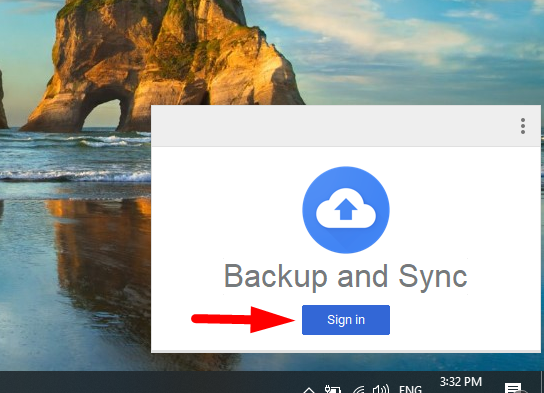
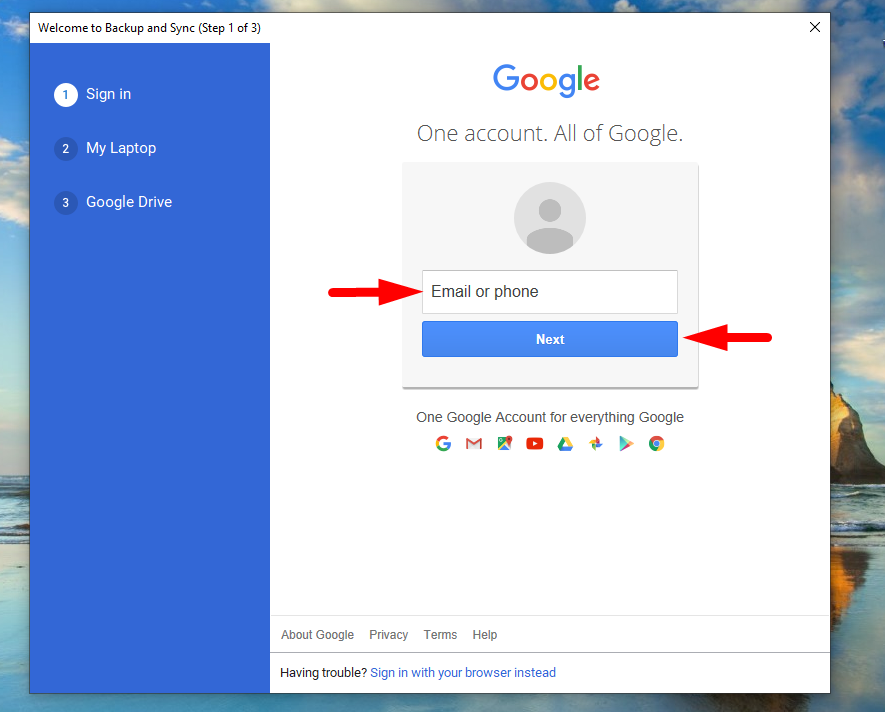
To start your hard drive backup, download the Google Drive app called Backup and Sync to your desktop. Open the app, sign in to your Google account and choose folders you’d like to back up, the upload size, or configure the network settings.
Sign in →
Enter Email or phone and press next →
Got it →
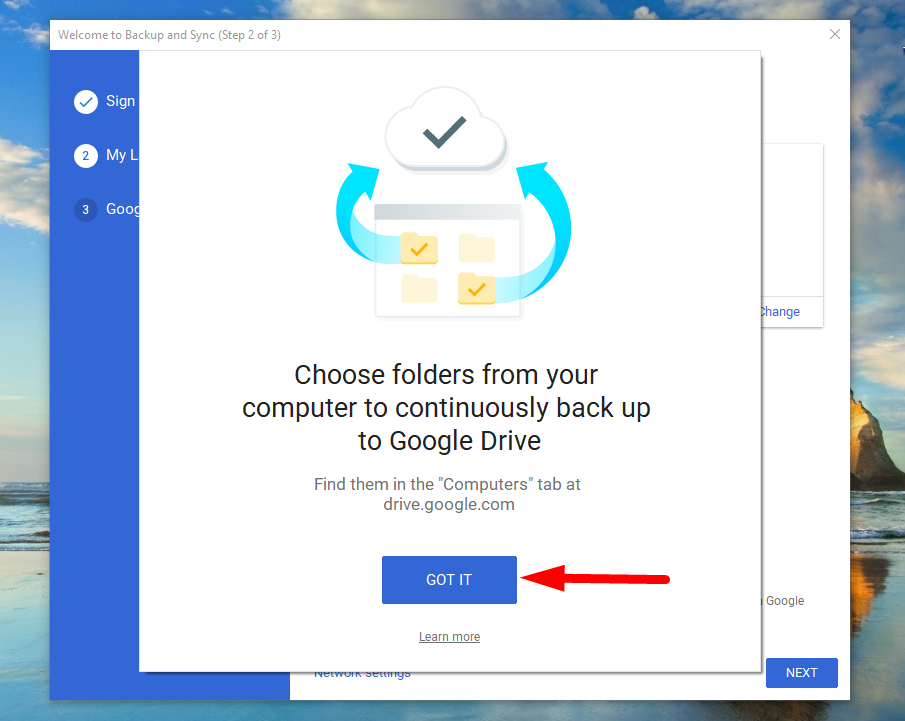
Next →
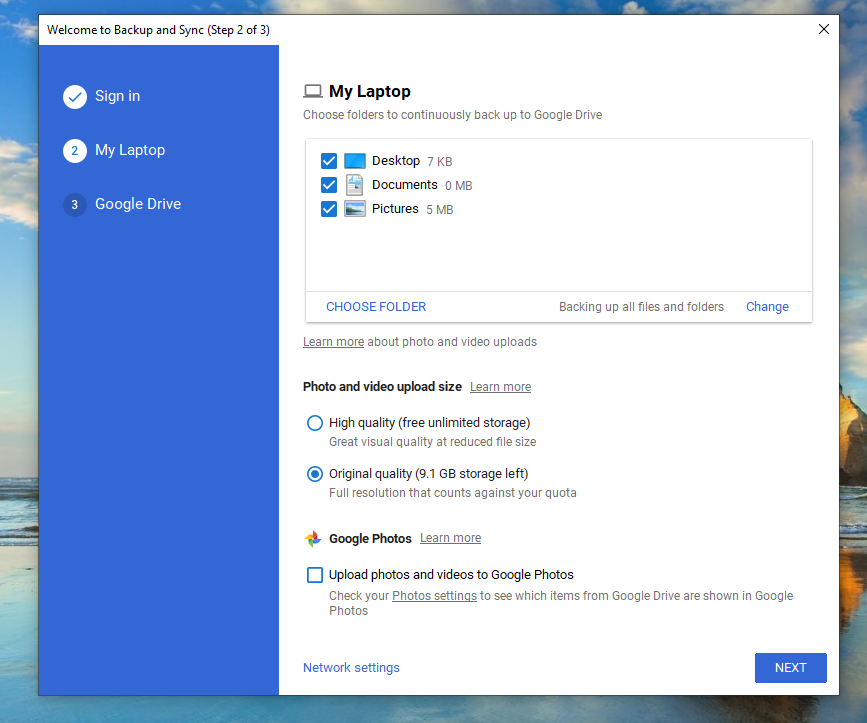
Start →
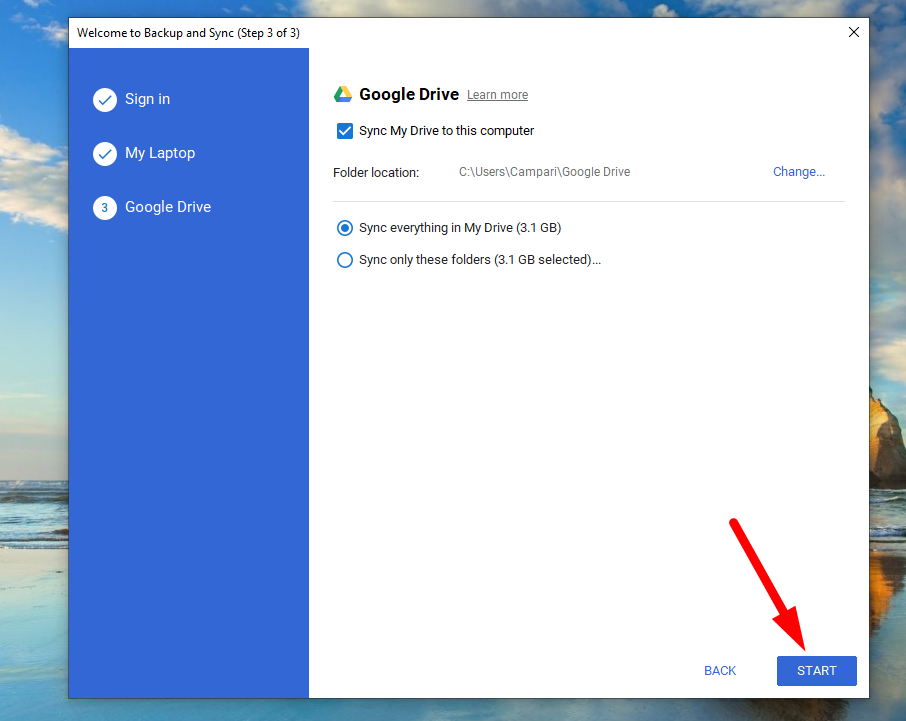
The process is pretty straightforward and resembles the one we’ve described for OneDrive.
Back up to iCloud
Besides Apple devices, you can also back up your PC. Let’s see how you can do both.
First, you must make sure all your Apple devices are up to date. Check if they have the latest iOS, iPadOS, or macOS installed.
Set up iCloud on all your devices and make sure you’ve signed in with the same Apple ID on all of them. For Windows (7 or later), download iCloud for Windows.
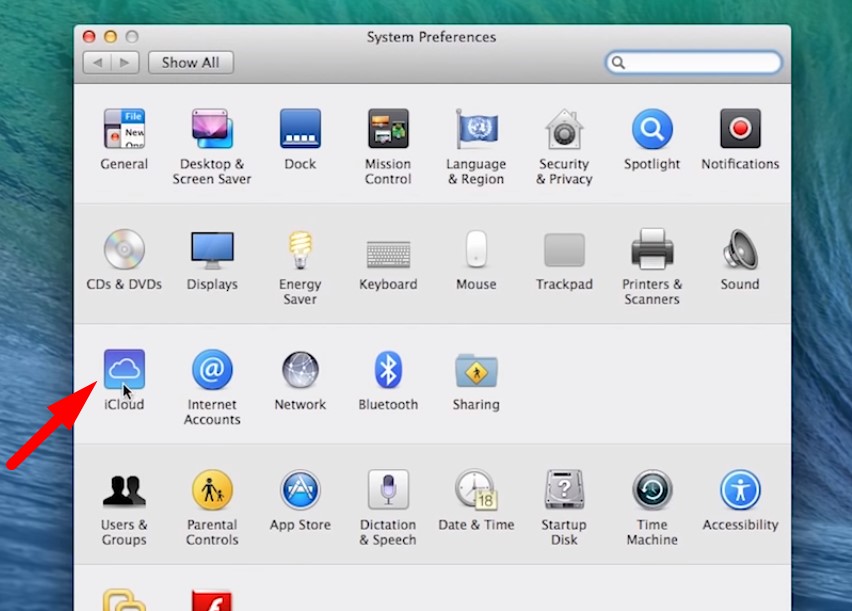
If you’re using a Mac, click on the Apple in the top left-hand corner and then click on System Preferences. Now click on Apple ID and select iCloud. You’ll be prompted with a sign-in page, after which you need to Select iCloud Drive.
System Preferences →
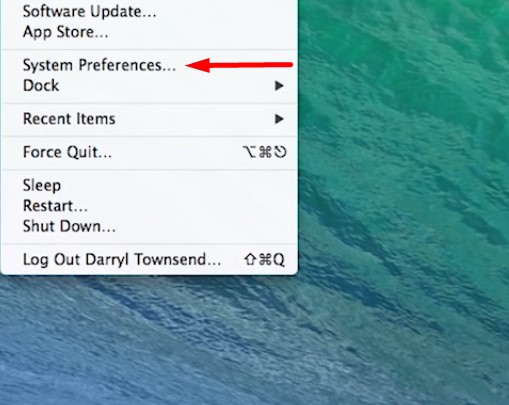
iCloud →
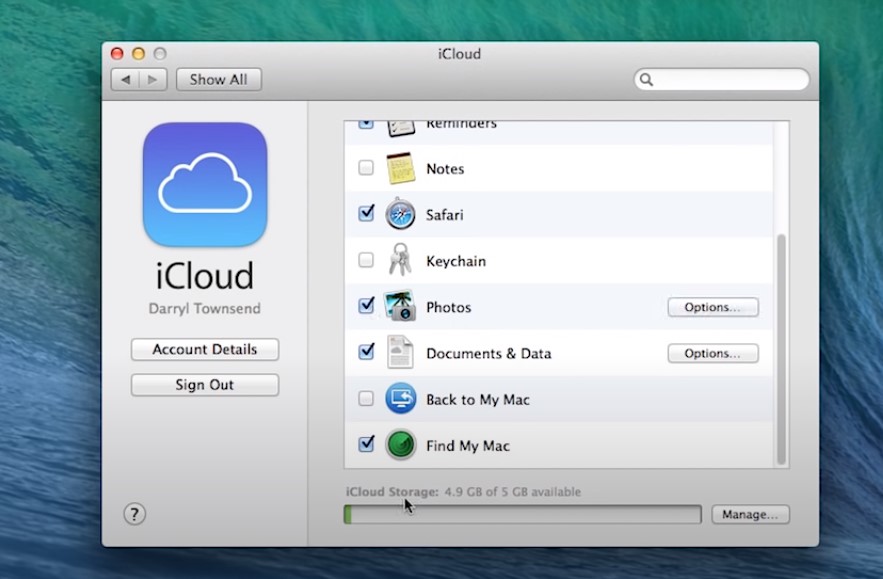
If you want to add the files from your Mac Desktop and Documents folder to iCloud Drive, update your Mac to macOS Sierra or later and turn on Desktop and Documents.
For Windows, download the iCloud app from the Microsoft Store, sign in to iCloud, select iCloud Drive, and click Apply. Any documents you store on iCloud will be automatically moved to iCloud Drive.
Paragon Backup Hard Drive | Open Cloud PCB Platform
Paragon offers two options: an out of the box Paragon Cloud Backup solution or an opportunity to build up your own backup using a comprehensive Open Cloud Backup Platform (OCB). With the trial backup solution, which is readily available, you’re getting 1GB of free backup space.
With OCB you’ll have an SDK with a set of microservices, which are both currently in their final stages of development. By joining Paragon’s Developer Community and using OCB, you’ll have access to all API documentation and developer guidelines.
OCB SDK consists of the following components:
- Backup model framework
- Load forecast reports
- Local agents bundle (installation and management package)
- Cloud storage access
- Extensive technical documentation
Back up a hard drive to USB
Backing up a hard drive to a USB Drive works in a similar fashion to an external drive.
Plug your flash drive into a USB port. It’s possible to buy 256GB flash drives for less than $50, with smaller and larger flash drives readily available.
Click Start and search for “This PC” or open Windows Explorer →
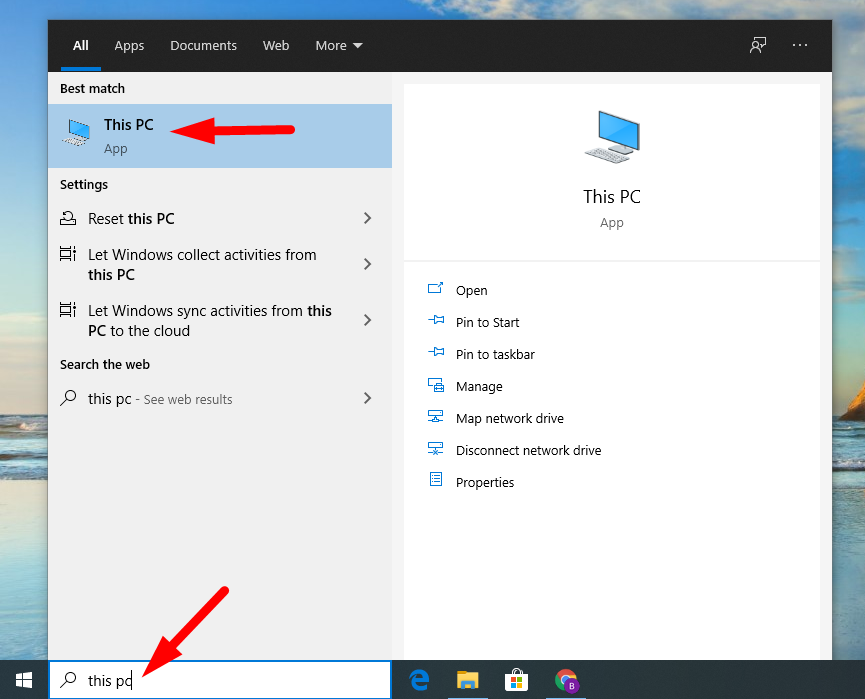
On the left-hand panel, locate the USB Flash Drive →
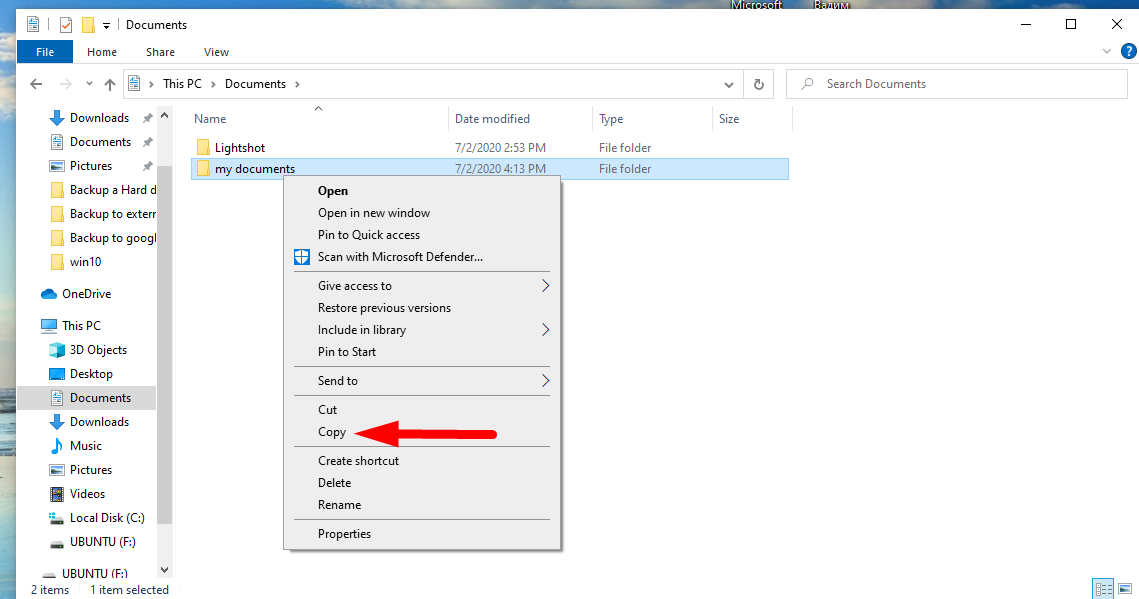
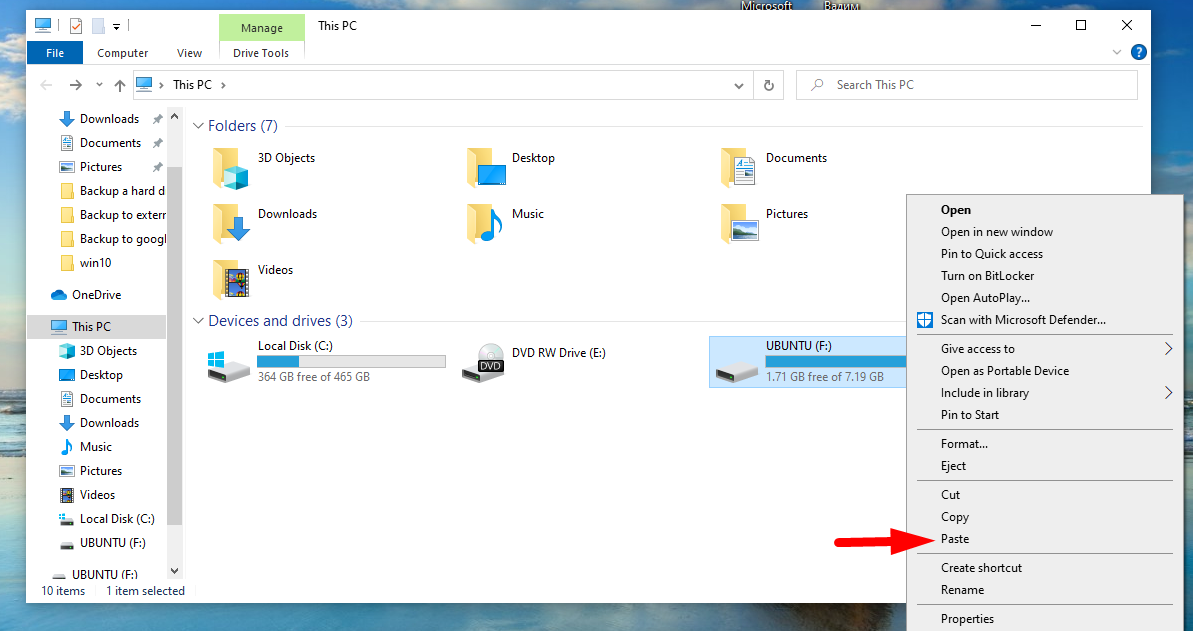
Minimize the window and while you’re locating all the files you want to back up to USB, left-click on them to copy. Then, return to the This PC window, click on the flash drive, and right-click to paste →
Back up iPhone to an external hard drive
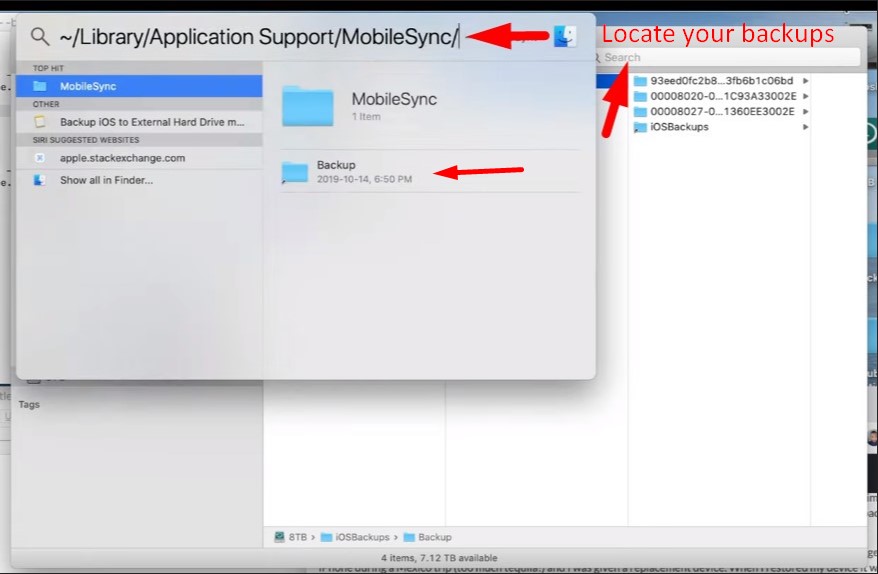
When you back up your mobile devices using your Mac, the backup is saved in a folder called MobileSync, which gets pretty large, especially if you have multiple devices all tied up to one computer.
The best solution is to back up everything to iCloud, which we’ve described earlier. However, if that’s not an option, let’s see how you can back up your Apple devices to an external drive.
Locate your backups first. You can either type ~/Library/Application Support/MobileSync/Backup into Spotlight or locate backups for a specific device from Finder:
- Click on Finder on your Mac’s Dock
- Select your device on the left side of the Finder window
- Then click Manage Backups on the General Tab
- Select a specific device
- Hold down the Control key and click on the device
- Select Show in Finder from the list of options
After you found your iPhone (or any other Apple device) you’d like to back up, it’s time to connect an external drive to your Mac, then open it →
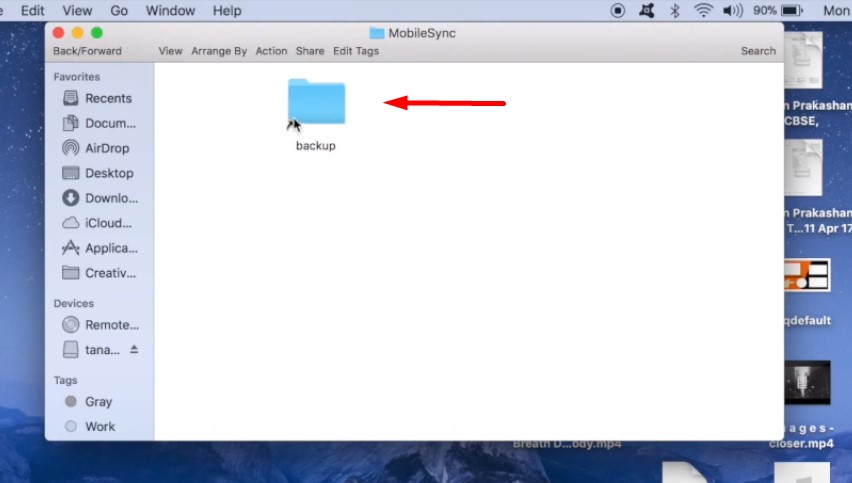
Return to the Finder window and select the device backup folder (it might be called either “Backup” or a bunch of numbers) →
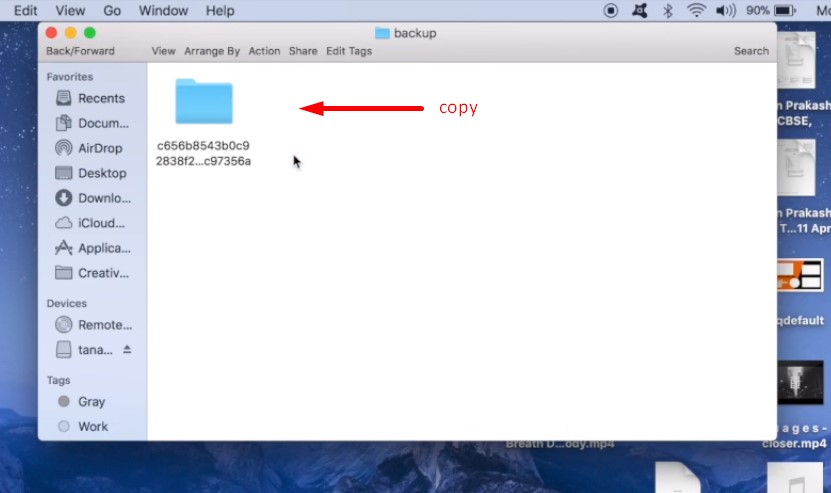
Drag it to your external hard drive →
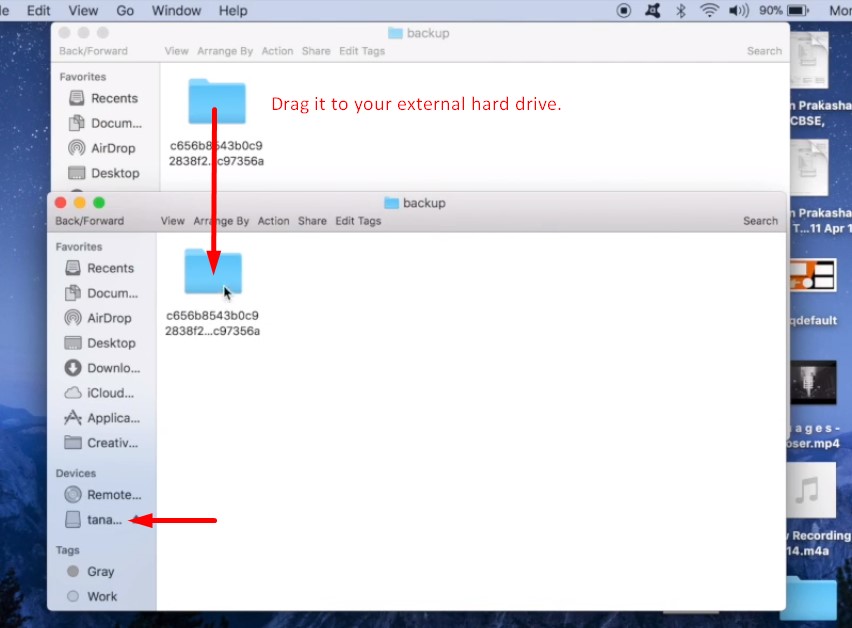
If asked for your administrator password in this scenario, enter it in.
However, always be aware on a Mac when asked to enter your admin password, if you aren’t expressly installing new software or an admin password request pops up when you aren’t expecting it, don’t do it. However, in this specific case, it’s ok to type it in.
Do not rename the folders! Otherwise, your computer won’t be able to back up your iPhone anymore and you’ll either have to move the folders manually or create a “symlink” to tell your computer the new location of your backups.
Back up an Xbox 360 hard drive
There are two ways you can save your games somewhere other than the console.
The first option is to back up your data to the cloud and the second one is to a USB flash drive.
To use the cloud, though, you have to have an Xbox Live Gold membership, which requires purchasing a subscription.
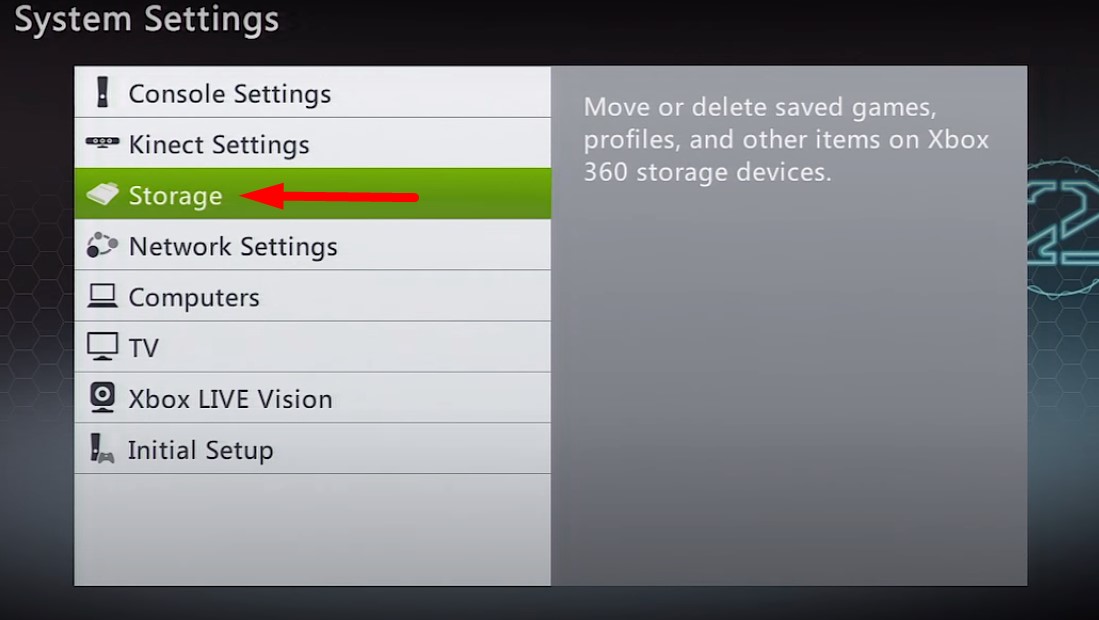
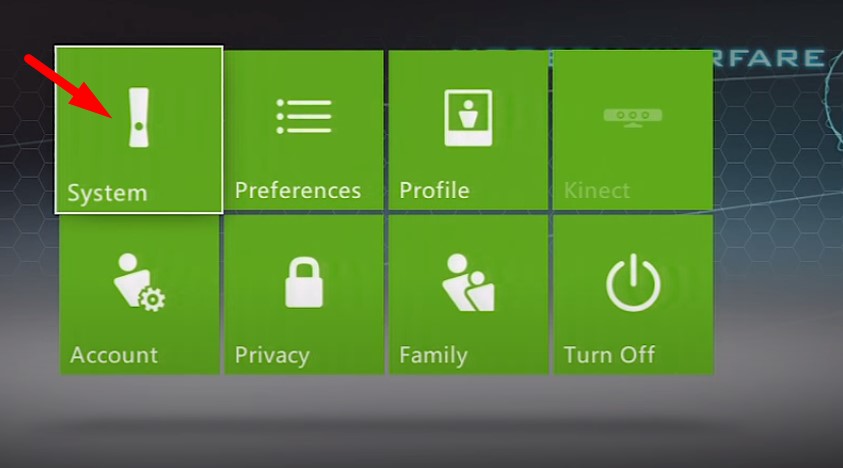
In case you have this, then you can enable cloud storage by signing in to your game profile, then going to Settings, and selecting the System tile →

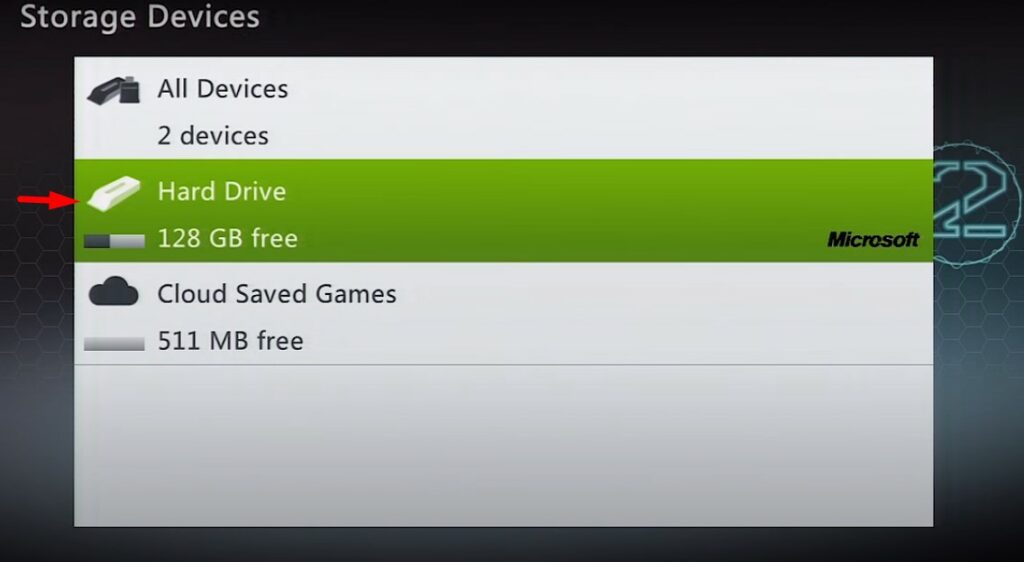
And Storage →
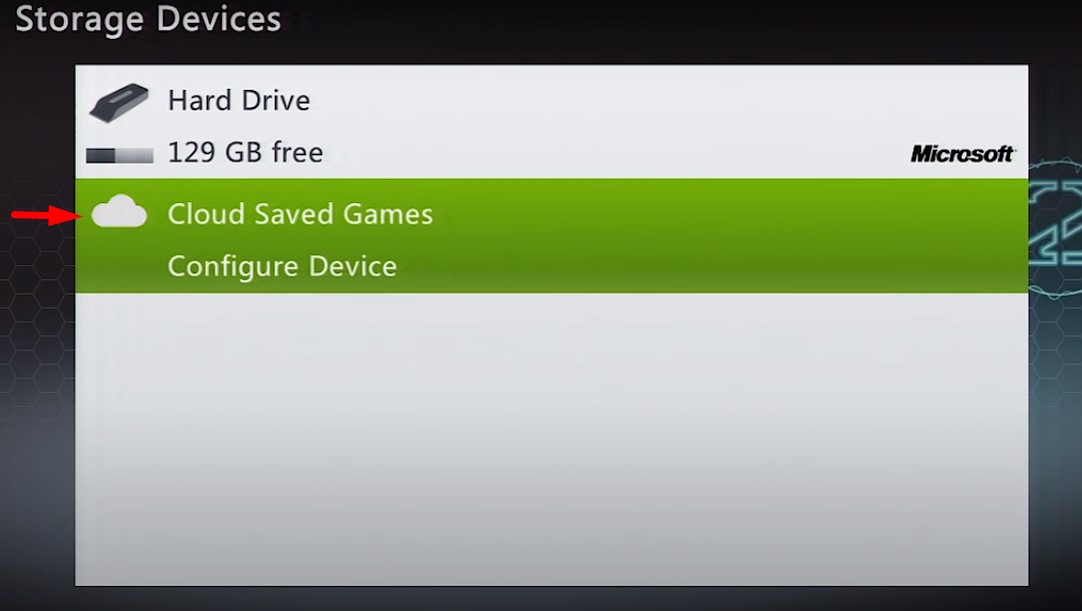
In the Storage, choose Cloud Saved Games →
And Enable Cloud Saved Games →
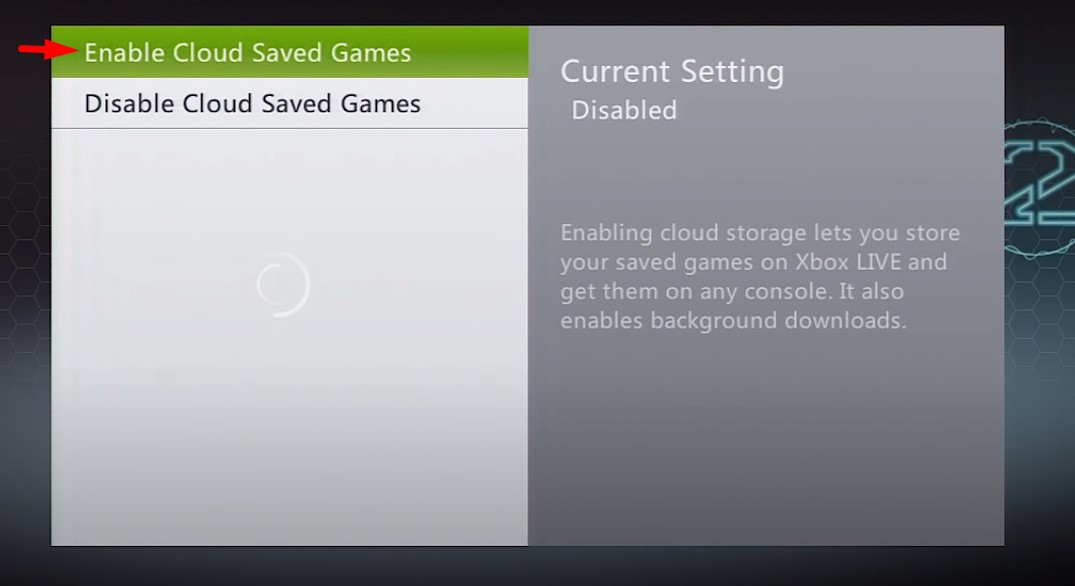
You can now move your saved games to the cloud by selecting your hard drive or memory unit, then choosing an appropriate game, selecting Game Save, Copy or Move, and then — Cloud Saved Games.
When playing a game, you can also set up your cloud as your primary storage rather than your hard drive.
The second option is to back up the Xbox 360 hard drive to a USB flash drive. There a few conditions though for a flash drive [imposed by Microsoft], the drive must be
- Larger than 1GB
- Smaller than 16GB
- Formatted with FAT32
- Empty (because the Xbox will wipe out all the contents before backing up)
If your flash drive satisfies these criteria, then head on to your gamer profile, insert the drive in a USB port on your Xbox 360, then go to Settings in your dashboard.
Choose the System tile →
Storage →

USB Storage Device →
Configure Now [or Customize in case you only want to use a portion of the drive].
Choose Yes, when the prompt appears, for the Xbox to set up the USB drive for use.
Once it’s done, you’ll end up at the Storage Settings again, where you need to choose either a hard drive or memory unit depending on what your Xbox is using.
Then choose Games and Apps, and find the game you wish to back up.
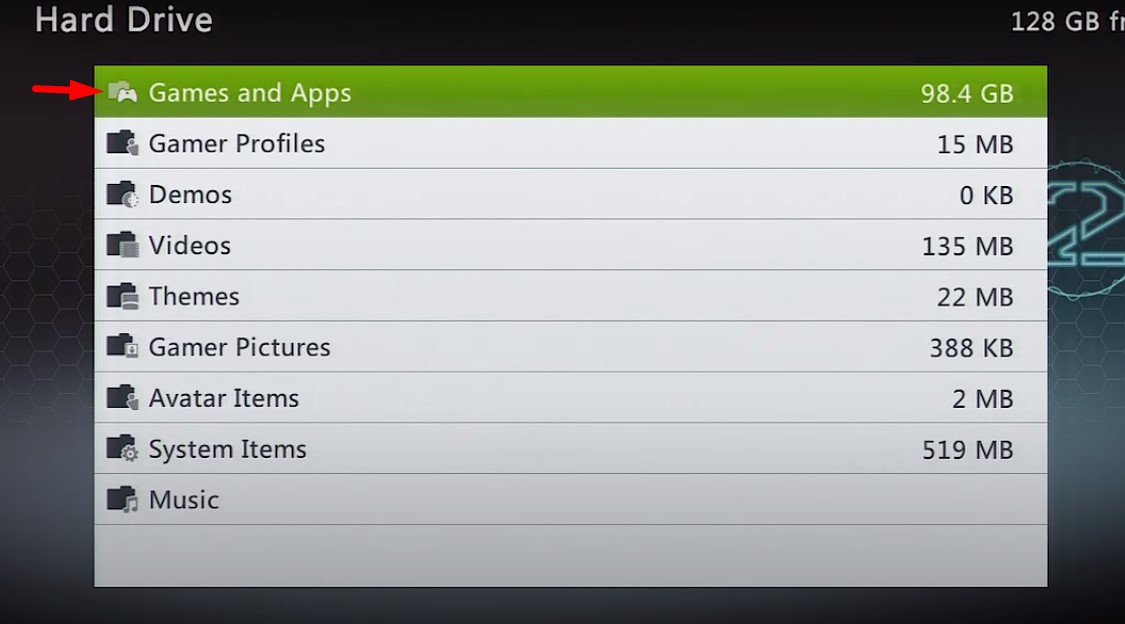
Select it along with any other games, choose Copy, select your USB flash drive, and paste it there.
Back up hard drive for PS4
Before you back up your PS4 hard drive, make sure you’ve synced your Trophies: press Options, choose the Sync with PlayStation Network.
Now, plug in your USB storage device that you plan on using for the back up into one of the PS4’s USB ports.
Then go to Settings →

System →
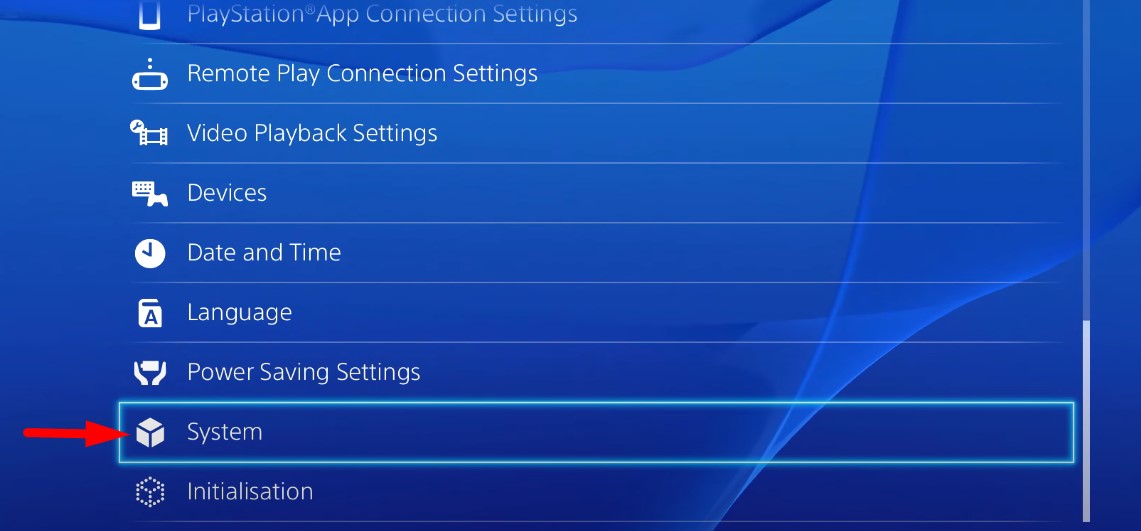
BackUp and Restore →
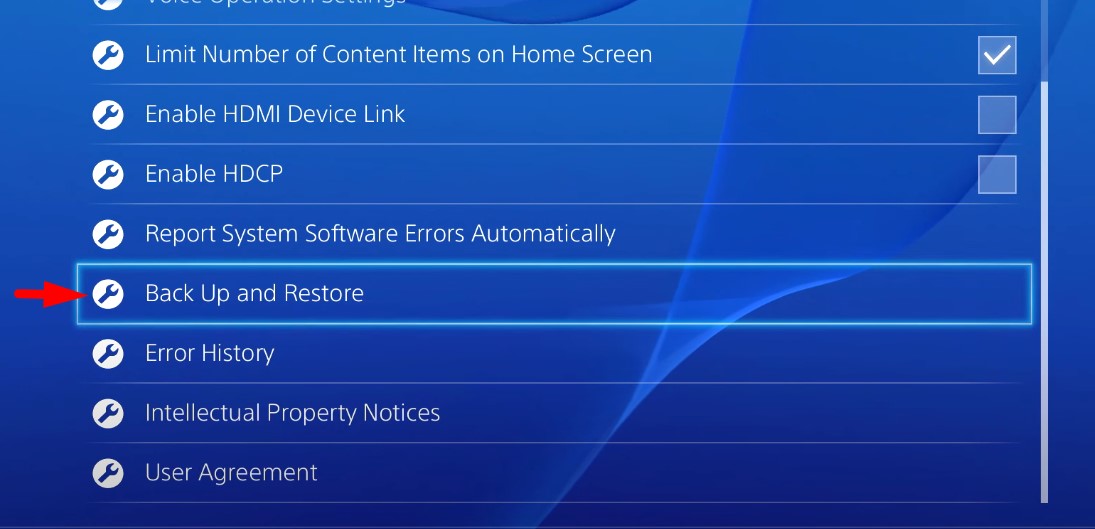
Choose the data you’d like to back up, then give it a name →
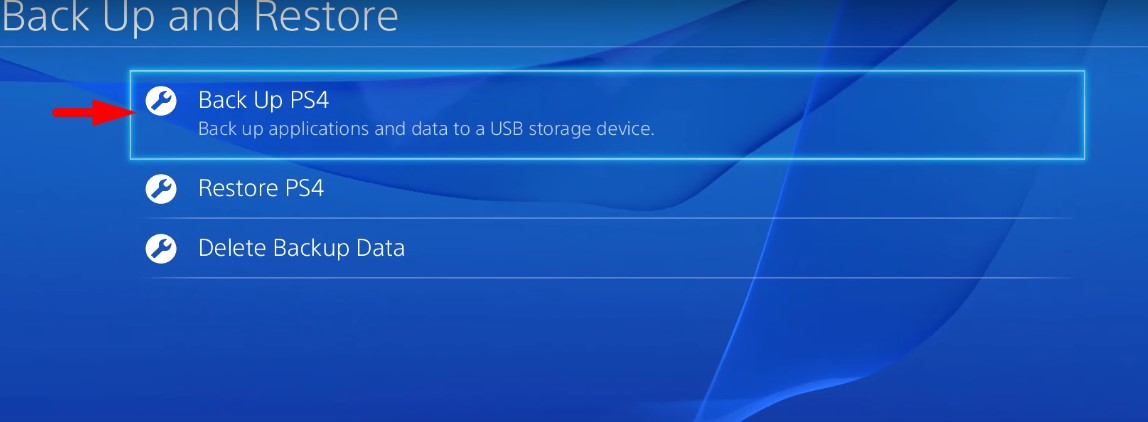
Once you’ve done that, highlight BackUp and press the X button.
A progress bar will show the current status of the backup, which you can cancel at any time.
The peculiarities of backup on different operating systems
Although we’ve covered some of the peculiarities of backing up your data on different OS, it’s still worth going through them again and adding up the missing pieces.
How to back up Mac
There are a couple of ways to back up your Mac. Let’s quickly sum them all up below.
You can either back up your Mac using Time Machine, you can store files in iCloud, or you can do both.
To back up a hard drive on Mac with Time Machine:
- Connect a new external drive to your Mac and select it as your backup disk
- Select Encrypt Backup Disk then click Use as Backup Disk.
Consider using an external SSD or solid-state drive rather than a spinning hard disk drive or HDD. An HDD is cheaper than an SSD, but SSD prices have fallen dramatically, and they are much faster and more robust than an HDD.
If while connecting your external drive, Mac doesn’t ask you to use the drive for backup, do it manually:
- Go to Apple menu → System Preferences → Time Machine
- Click Select Backup Disk [or Select Disk or Add or Remove Backup Disk]
- Select your external drive from the list of available disks.
- Select Encrypt Backup Disk then click Use [as Backup] Disk.
To store your files in iCloud:
- Update your Apple devices to the latest iOS, iPadOS, or macOS.
- Set up iCloud on all your devices
- Sign in to iCloud with your Apple ID on all devices
- For Windows 7 and later download iCloud for Windows from Microsoft store
The other steps are as follows:
- Go to Apple menu → System Preferences → click on your Apple ID
- Select iCloud
- Sign in with your Apple ID
- Select iCloud Drive
Now, if you want to back up your Mac Desktop and Documents to iCloud Drive, update your Mac to macOS Sierra or later and turn on Desktop and Documents.
How to back up Windows 10
To back up a hard drive for Windows 10, go to Start →
Settings →
Update & Security →
Backup →
Add a drive and then choose a network location or an external drive you want to back up to →
How to back up Windows 7
For backup on Windows 7, you’ll be using the Backup and Restore utility. Follow the steps:
Click Start →
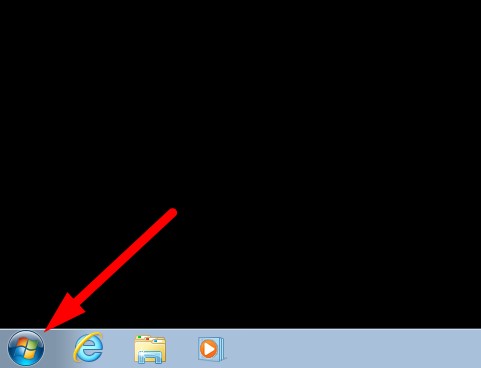
Control Panel →
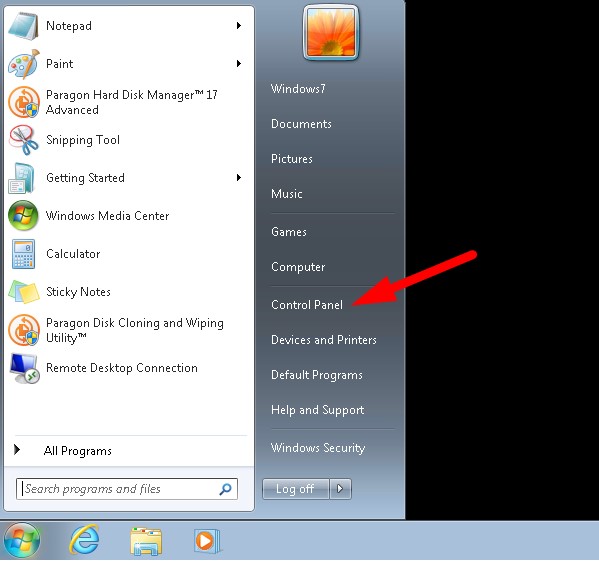
System and Security →
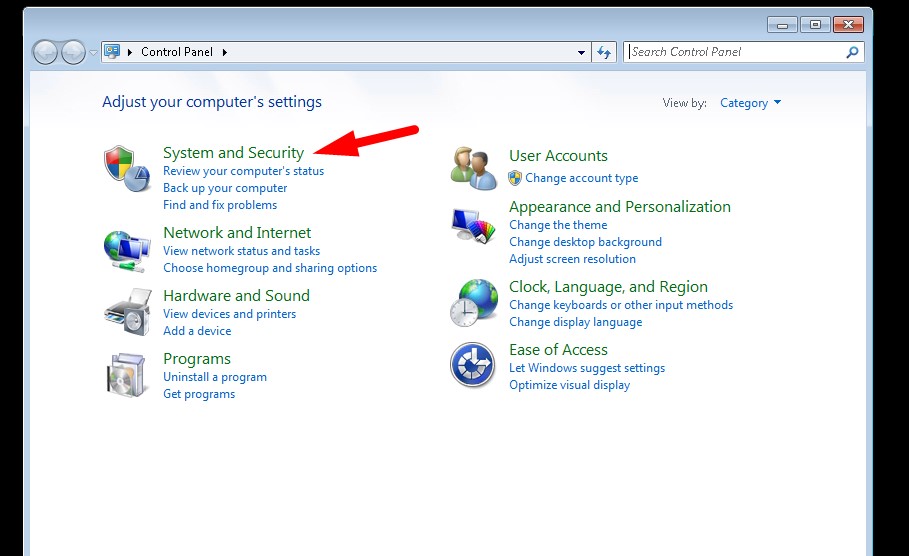
Backup and Restore →
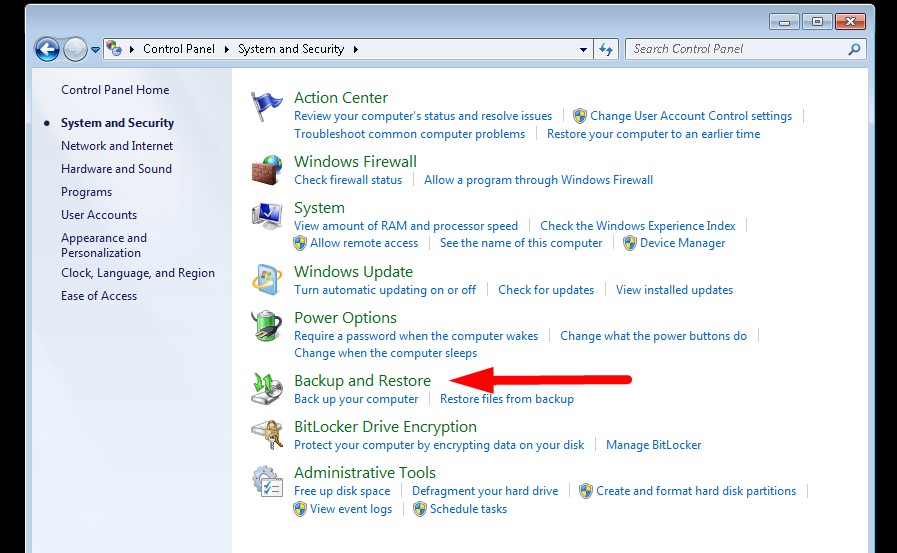
Set up backup →
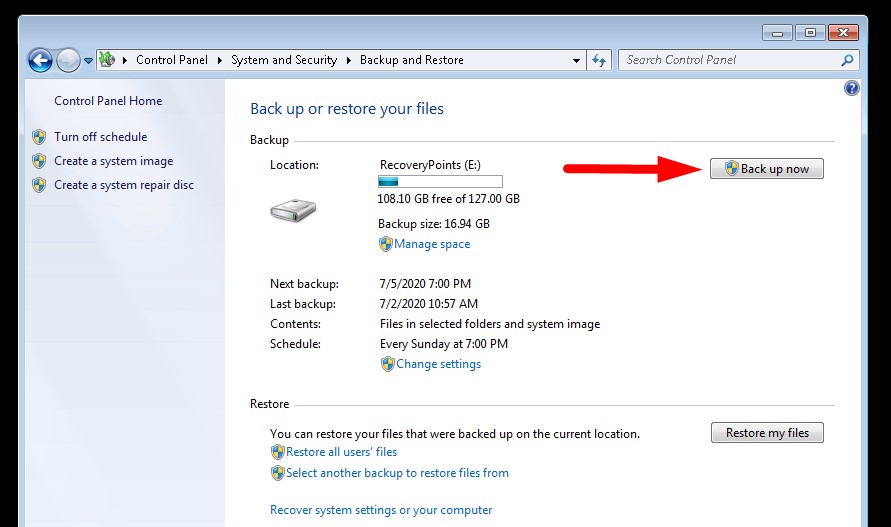
- Select where you want to back up your files to, then click Next [options are hard disk, writable DVD, network]
- Choose ‘Let Windows choose’ to back up the files the system thinks should be backed-up [recommended]. Alternatively, you can select individual files and folders to backup.
- Click Next, then verify the backup details
- Click Save settings and Run backup
- After the backup process is complete, the Backup or Restore your files wizard will display the size of your backup file.
How to backup Windows 8
Back up to Windows 8 doesn’t differ much from Windows 10. These are the steps you should follow:
Go to Settings →

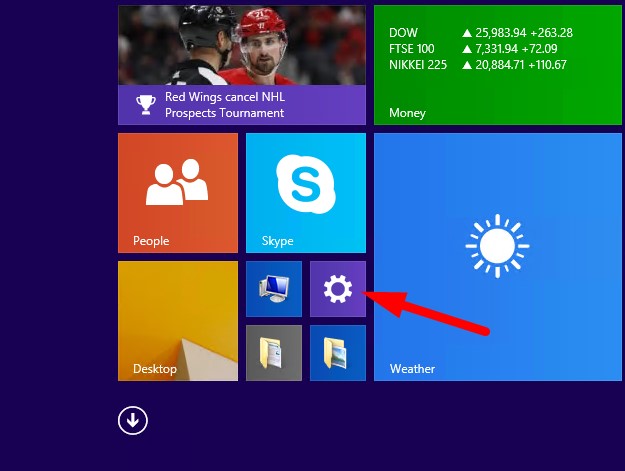
Control Panel →
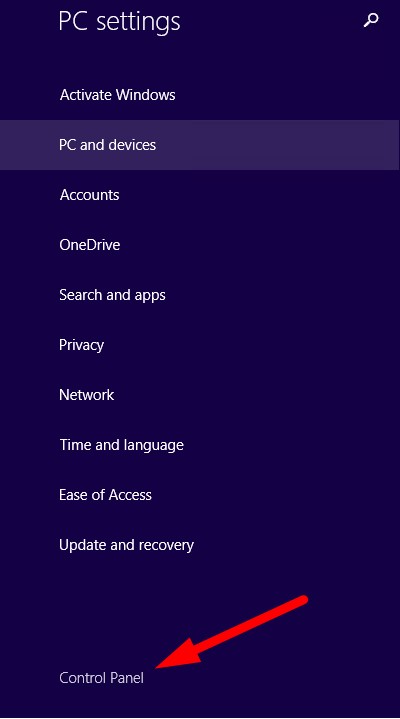
System and Security →
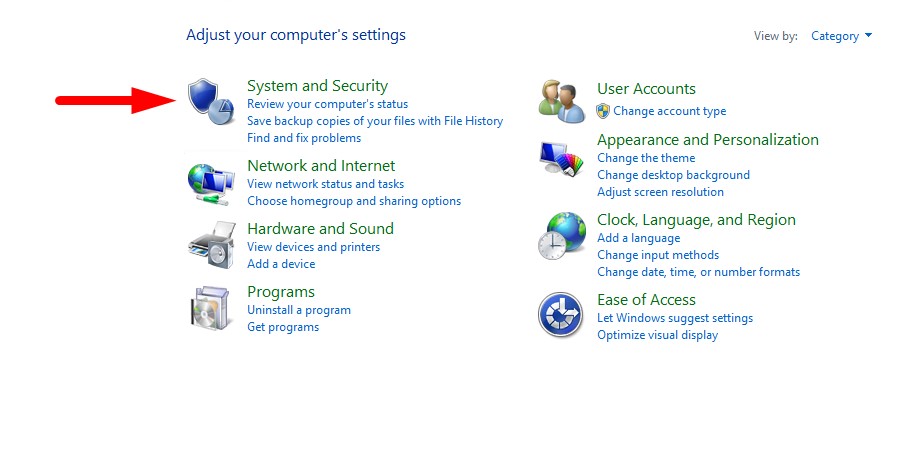
Save backup copies of your files with File history →

- While the utility software loads, select a destination to save your backup
- Click turn on to start the backup process → Save your backup on an external drive or network
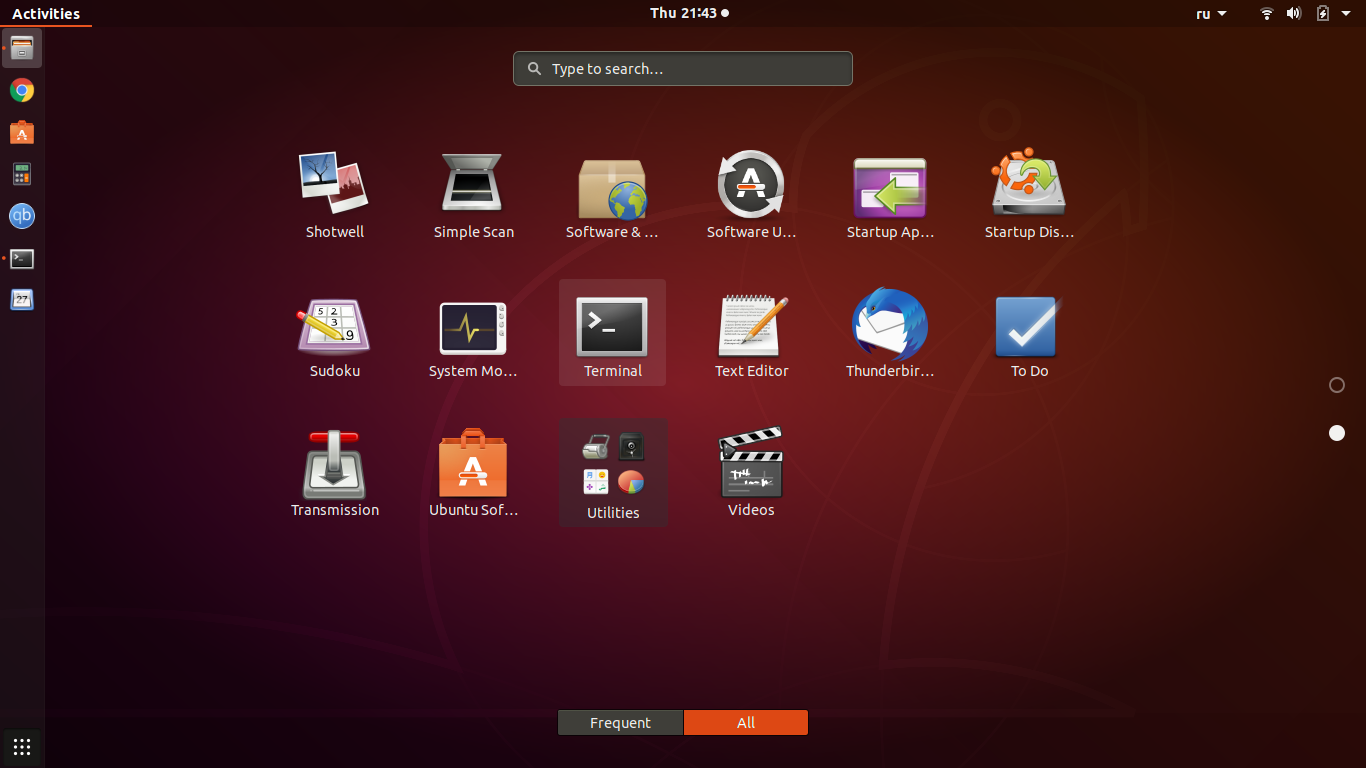
How to back up hard drive on Linux
There are a few ways to back up your data on Linux — disk image with “dd” command in single-user mode (boot mode) or using “tar” command to archive and compress partitions separately. The first option is not very flexible, but it creates a backup of everything, including the empty space.
Backing up your data to a disk image is pretty straightforward and faster than any other type of backups, enabling you to quickly restore data following an unexpected incident.
Open terminal →
Use the following command to back up the hard disk to a disk image.
# dd if=/dev/sda of=/var/tmp/sda_disk.img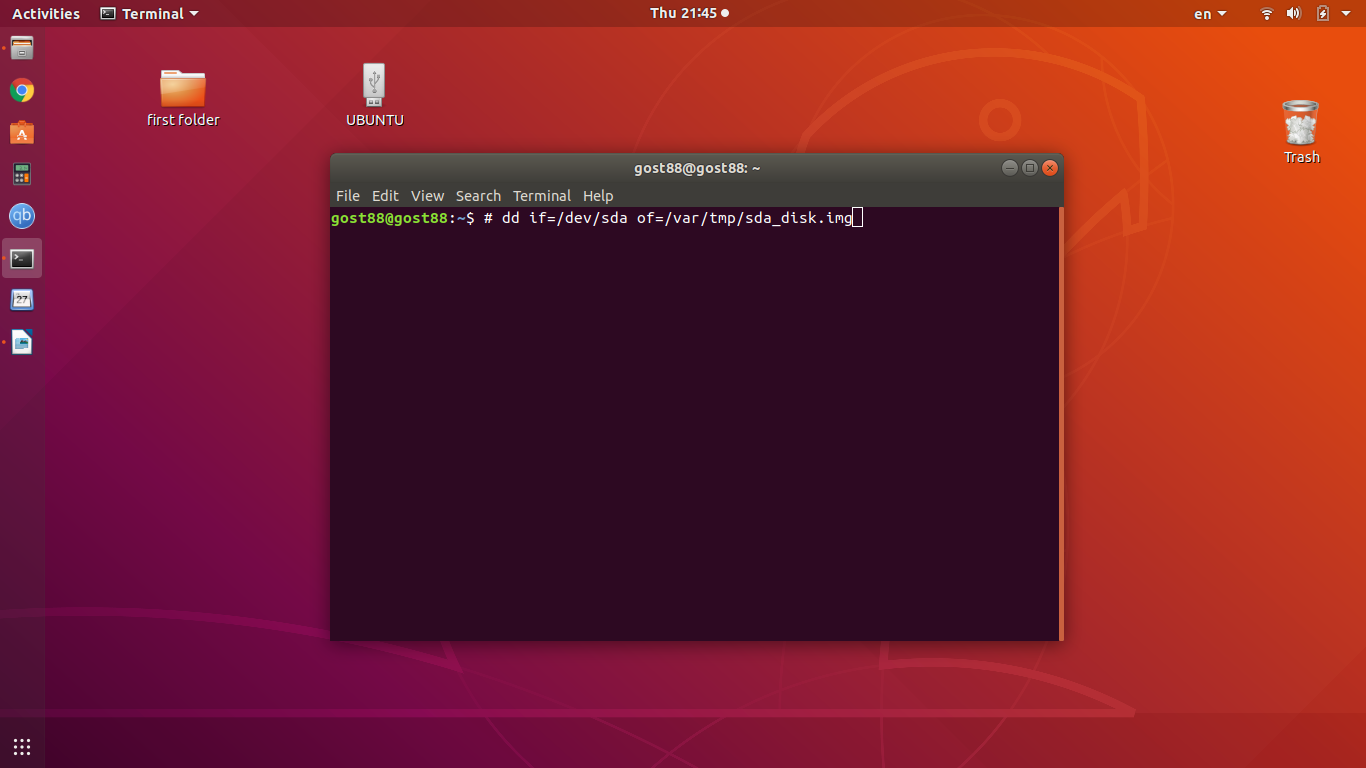
Where
if is the source disk drive (/dev/sda)
of is the destination disk drive (/dev/sdb)
To restore a hard disk image, use the following command:
# dd if=sda_disk.img of=/dev/sdcWhere
if is the source disk drive (/dev/sda)
of is the destination disk drive (/dev/sdb)
The Best Backup Software 2021 | The TOP 5 List
There are a few hard drive backup programs and tools you should be aware of in 2021 to take full advantage of the services they offer. Let’s get started.
Paragon Solutions
Paragon Backup & Recovery
Paragon Backup & Recovery offers a flexible solution with simple guidance of the Create Backup Job wizard that walks you through complex processes. With Paragon Backup & Recovery tool, you can run backups in manual mode or schedule reliable backup tasks, automate backup routines by scheduling recurring operations, and define new strategies with custom backup parameters.
There’s also the Recovery Media Builder, which helps you prepare a WinPE-based bootable environment on a USB drive or as an ISO image.
Paragon OCB Platform
We’ve covered Paragon OCB Platform earlier, but it’s worth mentioning Paragon’s OCB solution one more time.
There are two available options: a complete, out of the box solution, or the one where you can customize to your needs.
The solution that you can download as an app offers 1GB for a free trial period, and the one you can customize offers quite a few other perks, such as access to API documentation and developer guides.
The basis of the OCB platform is an SDK that consists of a backup model framework, load forecast reports, local agents bundle, access to cloud storage, and all supporting documentation.
The bundle of agents includes:
- Backup agent which conducts the backup, restoration, and operations
- Replication agent for uploading the backups to the cloud
- LocalWorker to check the statuses of local sessions and match them to the statuses in the cloud
There is also a set of microservices, which include inventory, registry, storage, jobs coordinator, notification services, and others.
Acronis True Image
Acronis is a paid backup solution that audaciously promises to never lose a file. The backup software simultaneously sends data both to the cloud and to a local drive. It can also do cloning and mirror imaging.
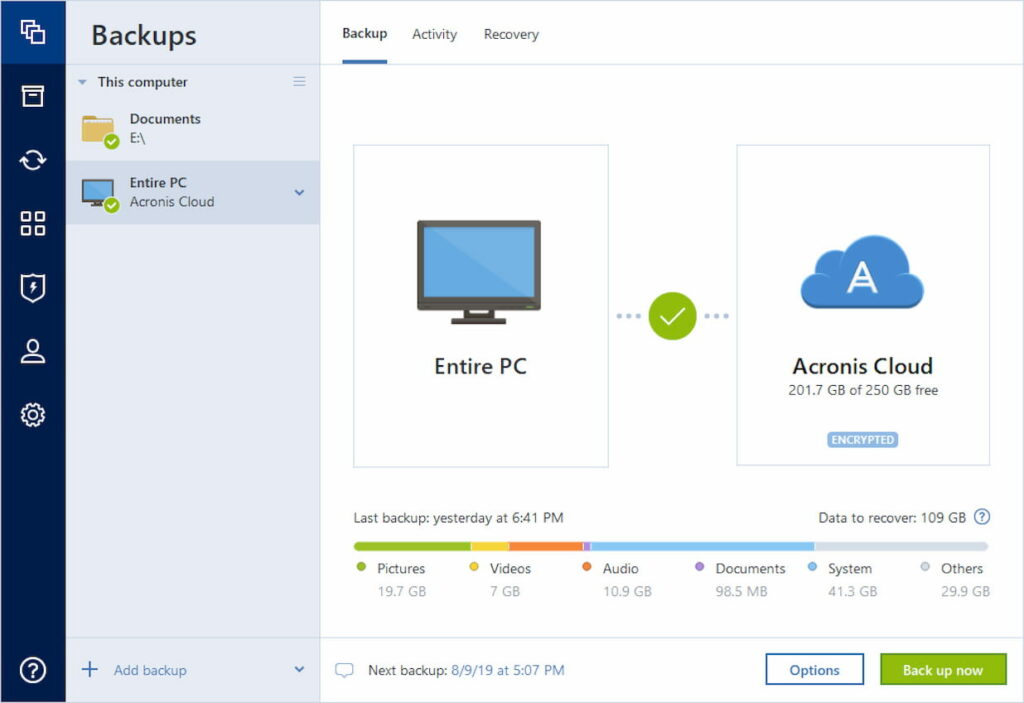
The solution also has an anti-ransomware feature that promises to keep your data safe and secure.
A one-time license for a single device is $59.99 without cloud storage.
Alternatively, you may purchase a subscription that starts at $49.99 per year.
EaseUS ToDo Backup
EaseUS has multiple packages for all types of users, whether businesses, home users, or service providers.
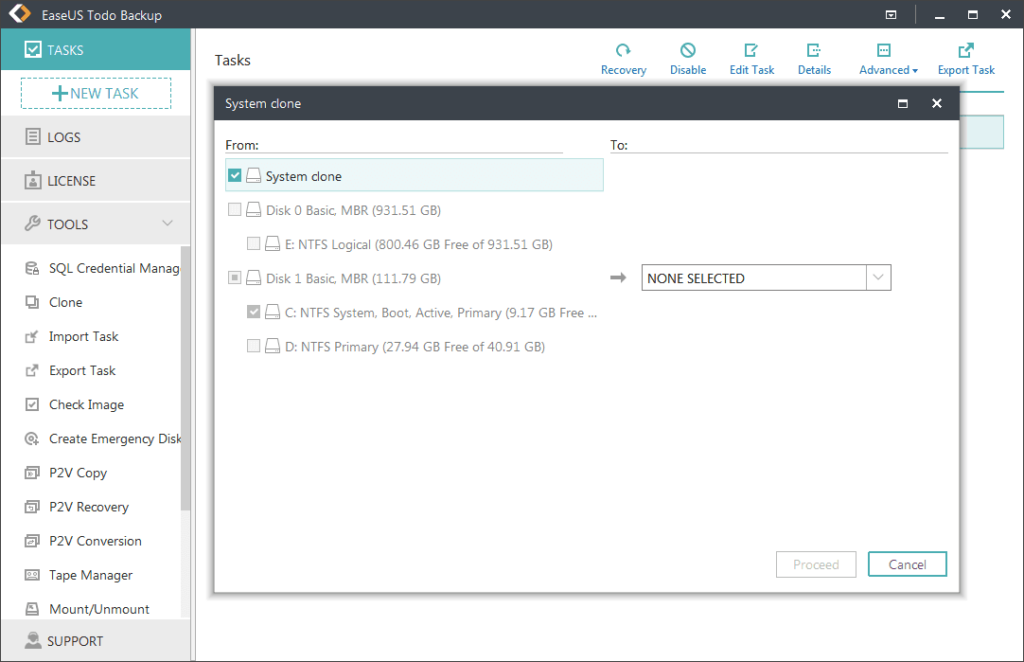
It offers both Windows and Mac software.
In the home office tier, EaseUS can handle up to 16TB of data.
There’s also a free solution, but home tier offers so much more that it’s probably well worth investing in it — available as a one-time purchase for $59.99.
There are also other subscriptions available, payable per month or yearly.
AOMEI Backupper
AOMEI Backupper is an easy to use app with a streamlined design and fast response.
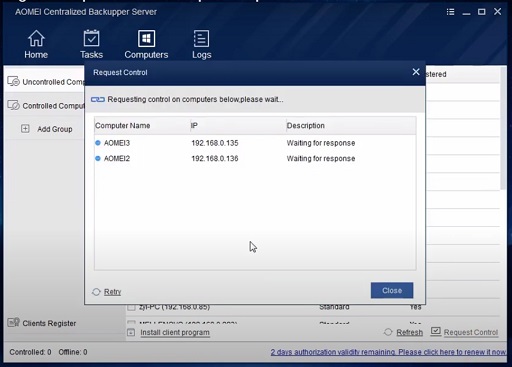
There’s top-notch support such as video tutorials and FAQs to guide you through the process of backing up your hard drive.
Although the service is mainly advertised as free, you’ll have to pay for additional features like combining multiple backups into one.
Genie Timeline
Genie Timeline offers a trial app for Windows XP and higher but unfortunately, not for any other platforms.
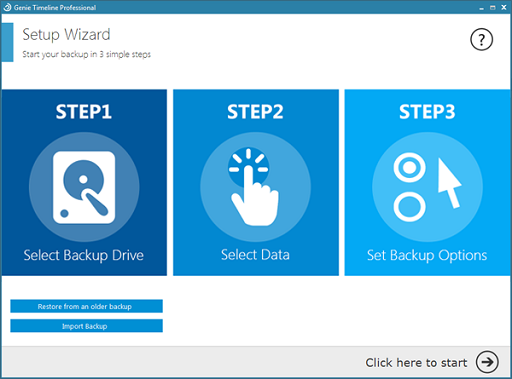
It also offers developer solutions for other situations, including Android and cloud backup.
There are a few modes within the app: Turbo Mode for an extra fast backup and Game/Movie mode to cut down on any interruptions or annoying pop-ups during your gaming or movie-watching experience.
If you have found a spelling error, please, notify us by selecting that text and pressing Ctrl+Enter.

Leave a Comment