When was the last time you backed up your Mac? Setting up a good backup system is important even if you think there’s nothing on your Mac worth holding on to. Although the process may seem intimidating or time-consuming, it really isn’t. Thanks to Apple’s Time Machine or iCloud sync, backing up your Mac has never been easier. So how to back up your Mac? Let’s dive into it.
In this article, you’ll learn:
- Why back up your Mac computer;
- How to back up a Mac (including MacBook Pro, Mac Mini, and MacBook Air) to an external drive and cloud;
- How to back up a Mac with Time Machine;
- How to back up a Mac without Time Machine;
- How to set up a Mac as a shared backup destination for Time Machine;
- How to back up your iCloud keychain
- How to сlone a Mac drive and create a bootable backup for Mac
- Top 5 best backup software applications for Mac on the market.
Why back up your Mac
With many of us now working or studying from home, storing and backing up either personal or business data has become more important than ever. Whether its a partially done work report or a school assignment, all data is equally important. Data loss can happen to anyone: computer viruses, ransomware attacks, system failures, theft, spilled beverages, even a hurricane, or a flood can cause you to lose everything in a matter of seconds.
If you think that you’re safe with an iCloud or Google Drive, you’re right to some extent; however, there’s still lots of stuff that’s not backed up to the cloud. For example, all passwords and application preferences are not stored for security reasons.
If you’re still thinking that you don’t have anything of value on your Mac, ask yourself a question — are you ready to buy a completely new computer and start fresh with no reference to your existing account numbers, passwords, keys, apps, and so forth? If you answered yes, then you’re among the few. If you said no, then it’s time to back up!
3-2-1: the rule of backup
Before we dive into technicalities, let’s remember the backup rule of three. We’ve mentioned this rule in our huge article on backup: Ultimate Guide to Backup, but it’s always worth repeating, right?.
The rule is not something that we invented, it’s actually an official strategy of the US Government:
To increase your chances of recovering lost or corrupted data, follow the 3-2-1 rule:
3 – Keep 3 copies of any important file: 1 primary and 2 backups.
2 – Keep the files on 2 different media types to protect against different types of hazards.
1 – Store 1 copy offsite (e.g., outside your home or business facility).
As Scott Hanselman, a popular blogger, podcaster, teacher, author, and speaker, succinctly puts it “BACKUP YOUR STUFF. If you care about it, back it up.”
Ready? Now, let’s get started.
Back up your Mac with Time Machine
Thanks to Apple’s extensive user guides, the backup instructions are comprehensive and easy to follow.
Let’s see how Time Machine can help.
Time Machine is the built-in feature for your Mac OS that helps to automatically back up your data.
When you have a backup, you can restore your files even in case they are deleted from your Mac or erased from HDD or SSD.
Time Machine makes hourly backups (for the past 24 hours), daily backups (for the past month), and weekly backups (for previous months).
When your backup disk is full, the oldest backups are deleted in favor of the newer ones.
How to back up Mac with Time Machine
Get an external storage device.
There are a few options for the external storage devices that you can use with Time Machine:
- External drives connected to your Mac like a USB, Thunderbolt, or FireWire drive
- An external drive connected to an AirPort Extreme Base Station (802.11ac model) or AirPort Time Capsule
- AirPort Time Capsule
- Another Mac that’s shared as a Time Machine backup destination
- NAS (or Network-attached storage) that supports Time Machine over SMB (Server Message Block).
After you’ve chosen your storage device, follow the steps below:
- Connect your external drive to Mac. If prompted, select that you want to back up Mac with Time Machine → choose Encrypt Backup Disk, which is a recommended option and is only accessible to users with the password → click Use as a Backup Disk.
In case Time Machine doesn’t ask you to select a disk, then follow the additional steps outlined below:
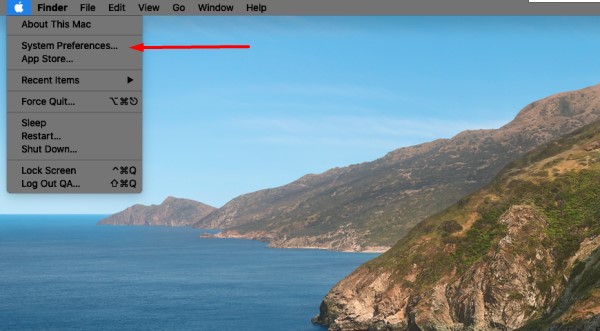
- Go to Apple menu → System Preferences →
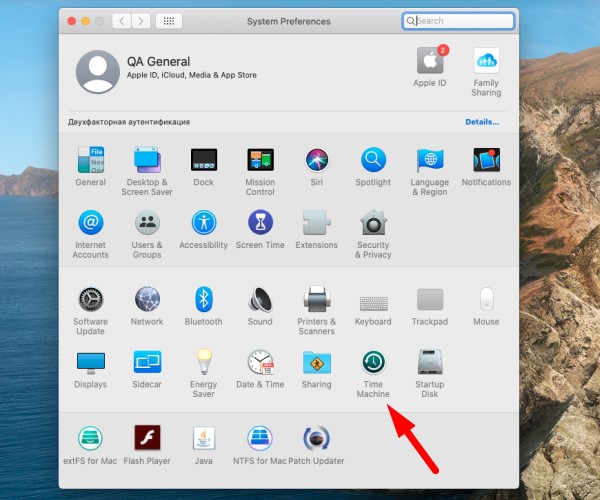
2. Double click Time Machine [OR Choose Time Machine preferences from the Time Machine menu in the menu bar]
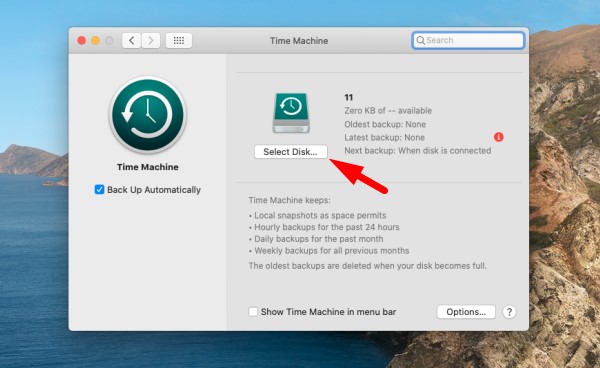
3. Click on Select Backup Disk [OR Select Disk OR Add or Remove Backup Disk]
4. Select your external backup disk from the list → choose Encrypt backups → click Use Disk.
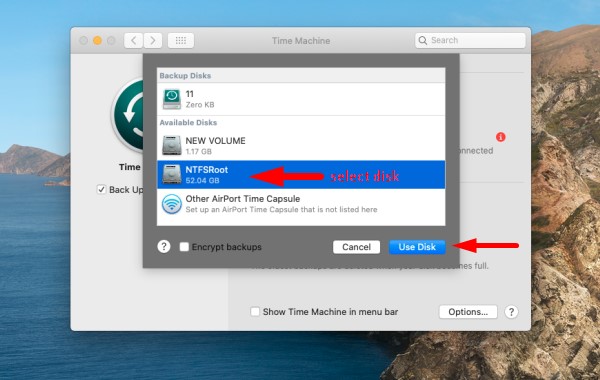
If your disk is not formatted properly, you’ll need to erase the disk first: click Erase to proceed.
- When you choose your backup disk, Time Machine will start making periodic backups automatically. While the first backup may be time-consuming, others will be faster since Time Machine only backs up files that have changed. In case you want to start a manual backup, then from the Time Machine menu in the menu bar, choose Back Up Now.
How to restore files from Time Machine
Now, let’s see how to restore files from Time Machine.
When restoring data from Time Machine, you can choose to either restore all your files or restore both macOS and all your files.
Suppose you want to restore your files only, then:
1. Connect your backup disk to Mac. Turn it on, then turn on your Mac
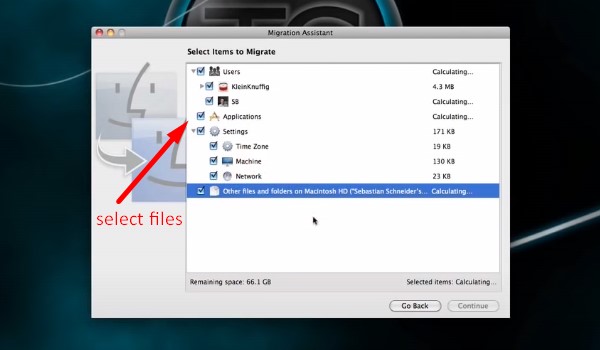
2. From the Utilities folder in your Applications folder, open Migration Assistant:
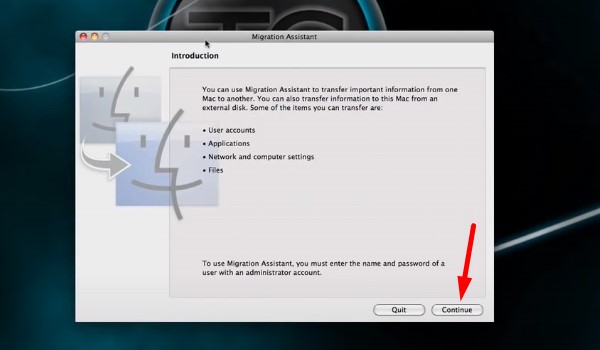
If your Mac prompts you to use the setup assistant (which includes the Migration Assistant) that asks for your personal details like country, network, and so forth, you may just continue to the next step
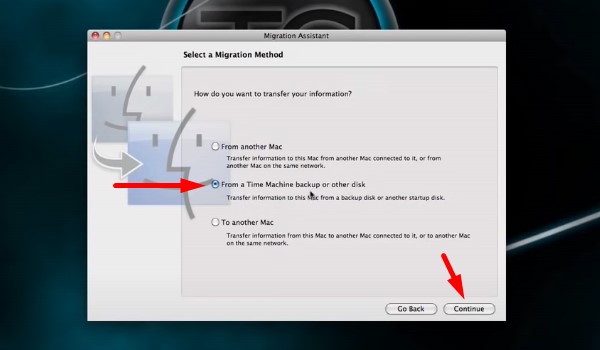
3. When asked how you want to transfer your information, select From a Mac, Time Machine backup, or startup disk → click Next
4. Select your Time Machine backup → click Continue
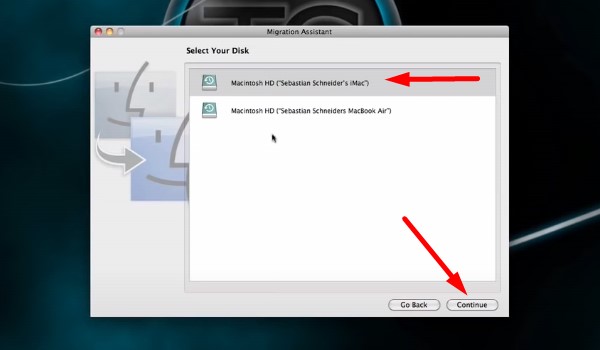
5. Choose which backup you want to restore from if promoted
6. Now, select the information you want to transfer → click Continue
7. When the transfer is complete, restart your Mac.
In case you want to restore both your macOS and your files, here’s something you should know before you start: the steps below will erase your HDD, then use your backup to restore your files and macOS used at the time of that backup.
- Connect and turn on your backup disk
- Turn on your Mac while simultaneously pressing and holding Command-R to start up from macOS Recovery. Release the keys as soon as you see a spinning globe or the Apple logo
- From the macOS Utilities window, choose Restore from a Time Machine Backup → click Continue → when prompted to select a restore store, choose your Time Machine backup disk (or select your startup disk, which can have a snapshot you can restore from) → click Continue → if your disc is encrypted, you’ll be asked to unlock it [enter the admin password] and click Continue again
- If available, select a backup → click Continue
- Select a destination disk [you’re not asked to select a destination disk when restoring from a local snapshot] → click Restore or Continue [in case your Mac has FileVault installed, you’ll be asked for an admin password].
- When the restore is done, restart your Mac.
How to use network drive with Time Machine
Apple doesn’t provide any backup migration wizard to move locally attached backups to a network share. However, there are still a few ways to back up your Mac to a network drive. None of them are ideal, so let’s cover one that offers the easiest way to do it.
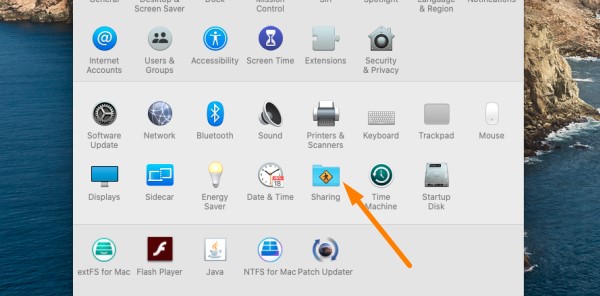
Apple has incorporated a Time Machine server in the standard release of macOS, controlled and configured in the Sharing pane.
1. Open the Sharing preference pane →

2. Go to Sharing folder →
3. Select the File Sharing Service at the left →
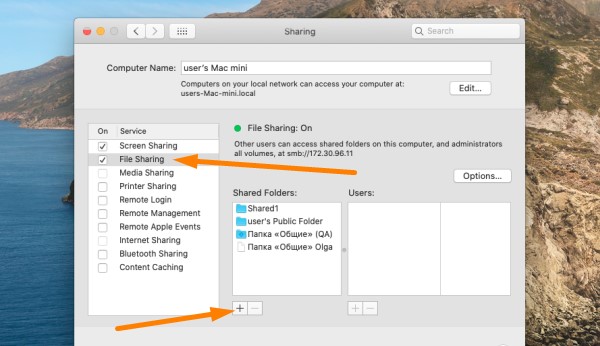
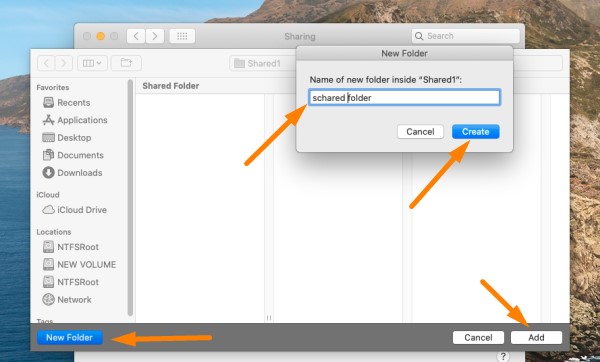
4. Then add the folder to store backups (as a Mac backup location) to the list of Shared Folders →
5. Choose that folder, right-click to bring up the contextual menu and choose the Advanced Options command.

6. The command opens up a dropdown sheet where you can configure your backup: Check “Share a Time Machine backup destination,” and optionally check the “Limit backups to [] GB”
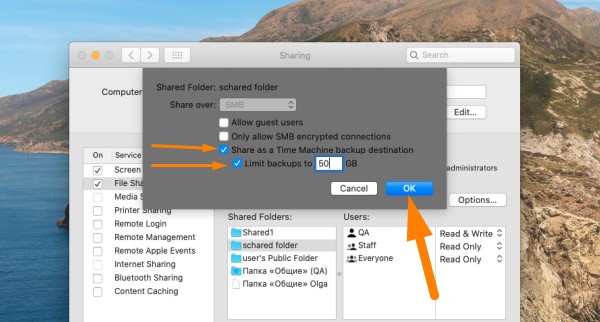
You’ve just created storage in a sparse bundle format that uses SMB/AFP.
If you want to backup your photos to iCloud, then the following section is for you.
Backup Mac to iCloud
Documents (including photos, mail, notes, calendar, etc.) that are stored in iCloud are synced and easily accessible across all your devices, which is why iCloud is perhaps one of the easiest backup solutions.
These are the steps to start storing your files in iCloud:
1. Update your Mac to the latest macOS (please check minimum system requirements to use iCloud)
2. Set up iCloud on all your devices. More info on how to set up iCloud can be found here. Make sure you’re signed in to iCloud with the same Apple ID across all your device
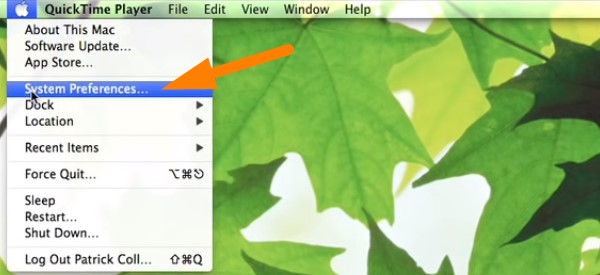
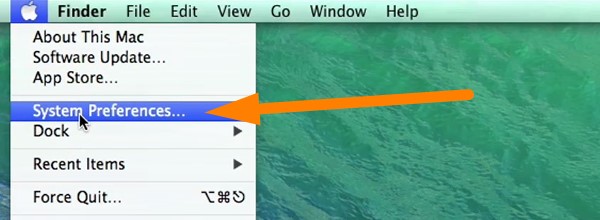
3. Turn on your Mac → go to Apple menu –> System Preferences → click Apple ID
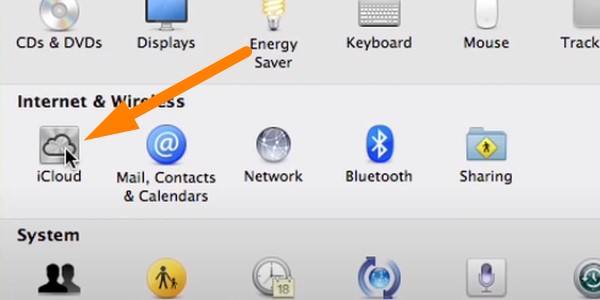
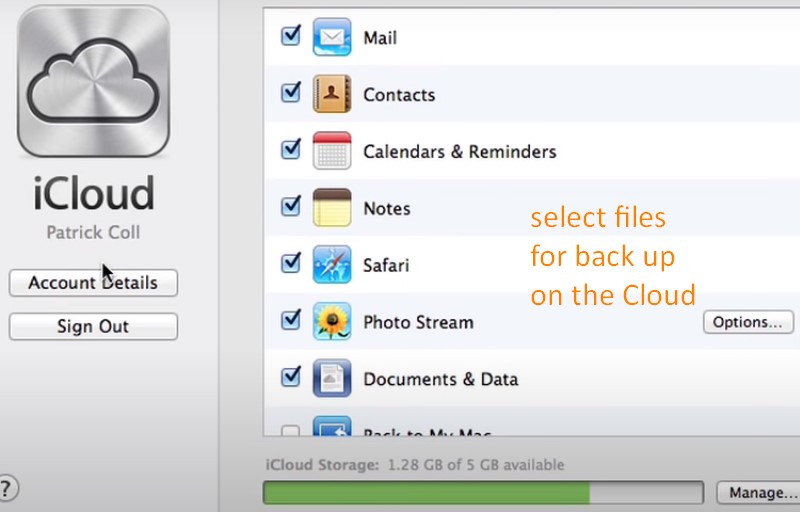
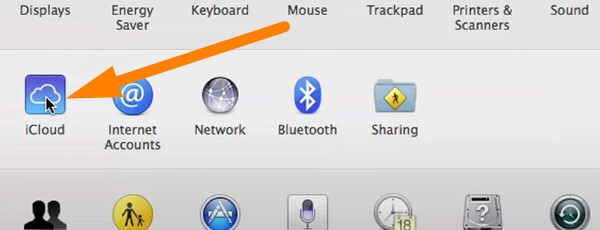
4. Select iCloud → sign in with your Apple ID if prompted → select iCloud Drive
5. Choose files you want to backup to iCloud
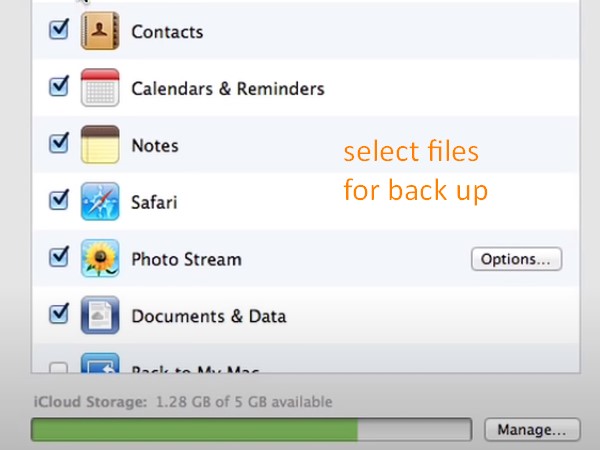
If you want to add files from your Mac Desktop and Documents folder to iCloud Drive, then you’ll need to update your macOS and turn on Desktop and Documents.
6. Sign in to iCloud.com → Select Pages, Numbers, or Keynote → Click Upgrade to iCloud Drive if prompted.
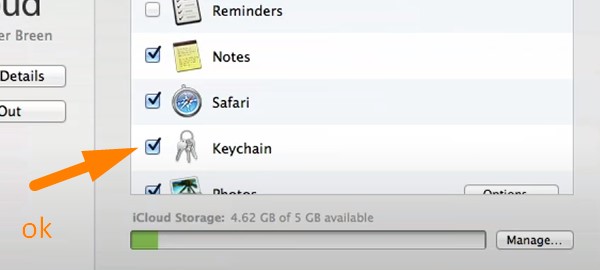
Backup keychain in iCloud
Keychains are some of the most important and hard to replace data on your Mac computer and iOS devices. Losing all your passwords, especially robust synthetic ones, is not fun for anyone. These are a few steps to follow to avoid that said catastrophe and actually back up your iCloud keychain.
Go to Apple menu → System Preferences
Click Apple ID → click iCloud in the sidebar
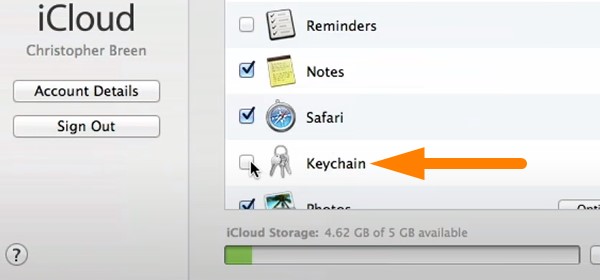
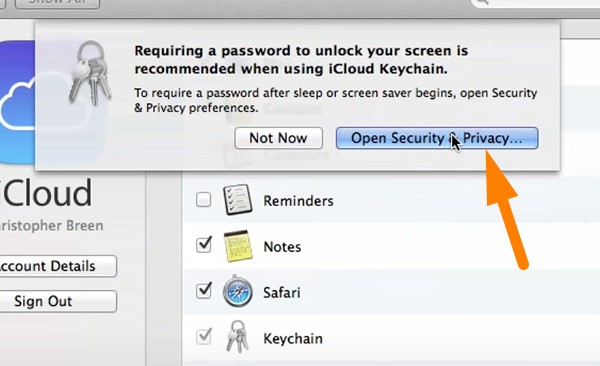
Choose Keychain
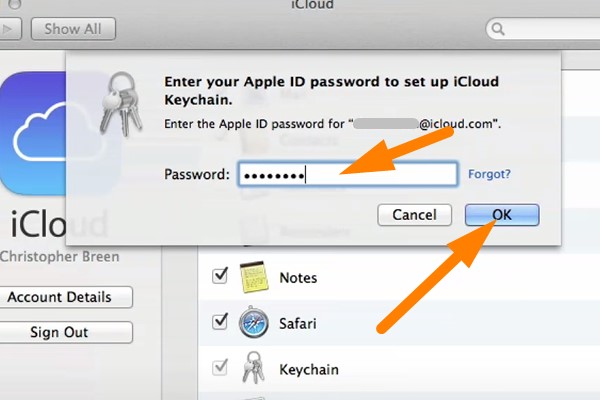
Approve with an old passcode or from another device when prompted. For that, choose “Open Security Privacy” →
Input the password → press OK
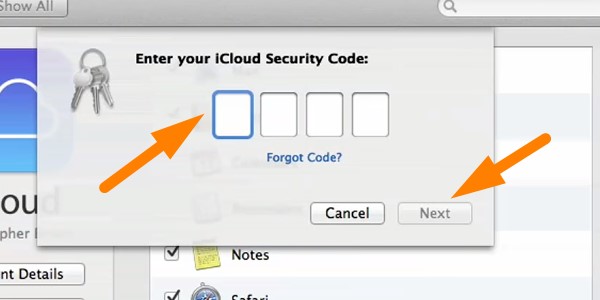
Otherwise, reset your end-to-end encrypted data or create an iCloud Security Code to authorize additional devices and verify your identity. For that, enter your new security code:
Then you’ll need to verify your new password
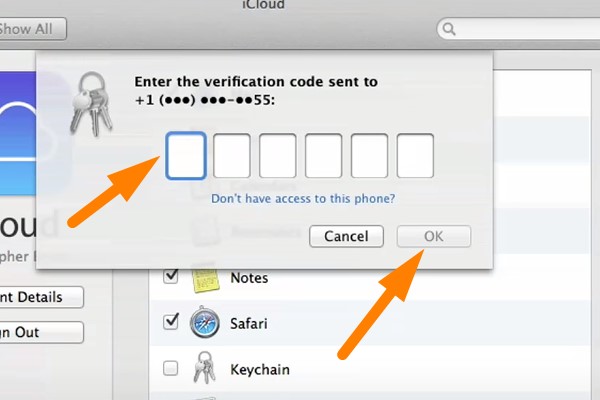
Now, you’re all-set and can perform the Keychain backup
Other cloud solutions to back up your Mac online
Apart from iCloud, there are other cloud storage solutions that you can use to back up your Mac.
The following services offer the simplest, fastest, the most popular, and the least expensive solutions on the market: Dropbox, Google Drive, and One Drive.
While using any of the solutions below (including iCloud above), first make sure your macOS is up to date.
Dropbox
There are two methods to back up your Mac drive to Dropbox: first, from the Dropbox website, and second, via a Dropbox app.
Mac Backup via Dropbox website:
- Go to dropbox.com and log in to your account (or create one)
- Click on Upload in the upper right corner and choose folders or individual files you want to back up from your Mac.
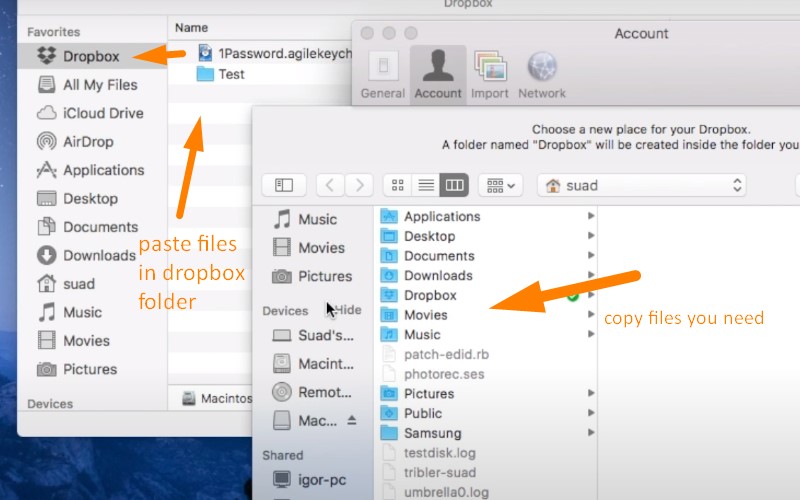
Mac Backup via a Dropbox app:
- Go to dropbox.com and install the Dropbox app to your Mac. When the download is complete, you’ll see a window with a Dropbox app on your screen
- Navigate to Home (main) folder → Open my Dropbox Folder → drag and drop files and folders you’d like to backup to Dropbox [otherwise, copy and paste].
Google Drive
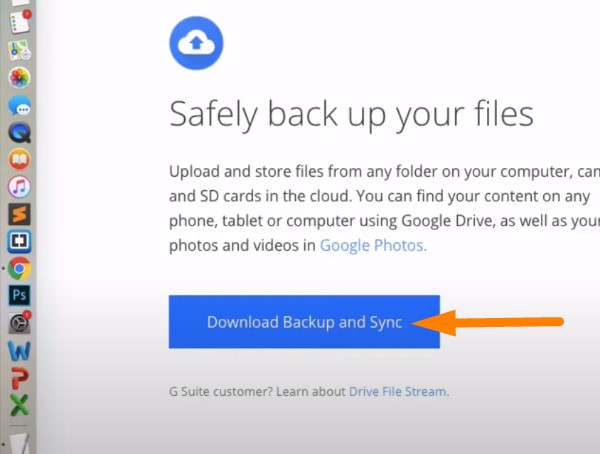
To start backing up your Mac to Google Drive, download Backup and Sync utility from Google Drive website, then follow the steps:
On your Mac, click Download Backup and Sync →
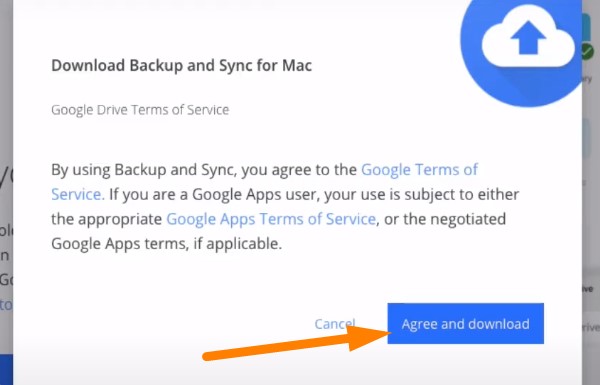
Click Agree to Terms of Service and then download
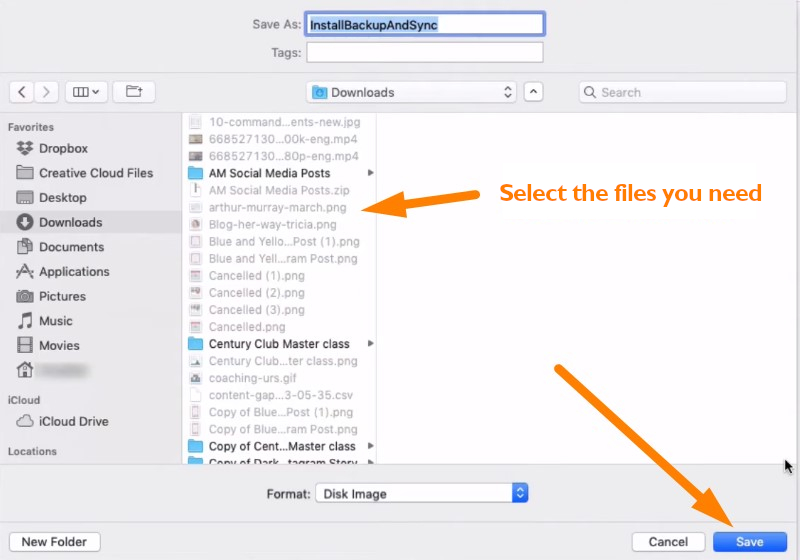
Open InstallBackupAndSync.dmg
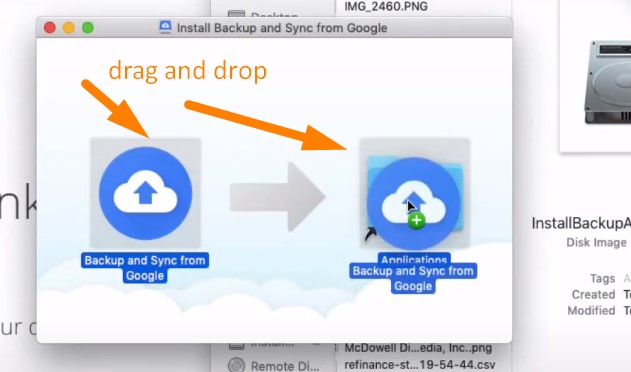
Move Backup and Sync to your Applications folder
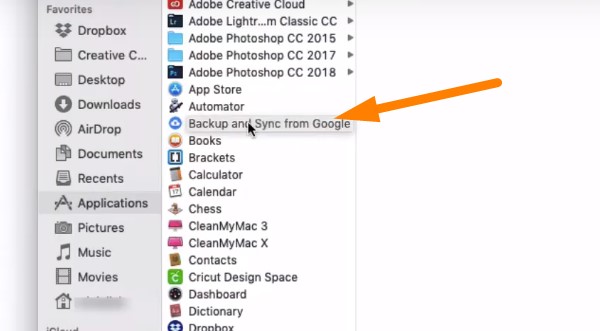
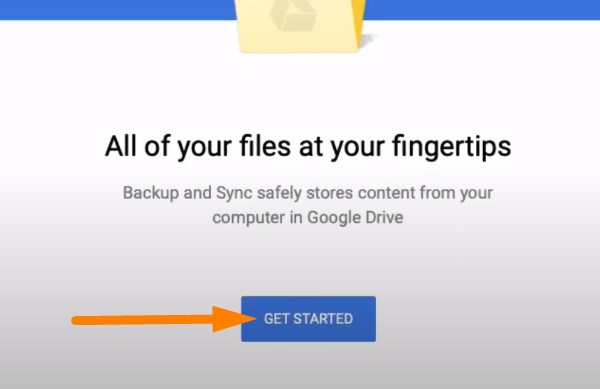
Open Backup and Sync →
Click Open button
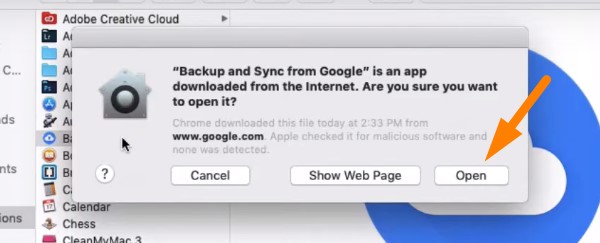
Agree by pressing OK →
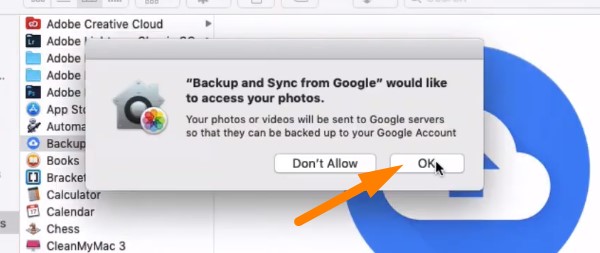
Then, sign in with your Google account username and password → choose your sync settings → click Next, then follow the instructions on the screen.
OneDrive
OneDrive comes with a Microsoft 365 paid subscription. Yet, since the Microsoft 365 account is not required to access OneDrive on your Mac, you need to download a free app or otherwise access OneDrive through your browser.
First, you need to make sure you have a Microsoft account, if not, create one.
OneDrive (like any other cloud storage) can be used in conjunction with other cloud-based solutions, including iCloud, Google Drive, and Dropbox.
Now, follow the steps below:
1. On the Dock, click on the icon for macOS App Store, and search for OneDrive, and proceed with installing the app as usual [otherwise, press Command + Spacebar and look for App Store]
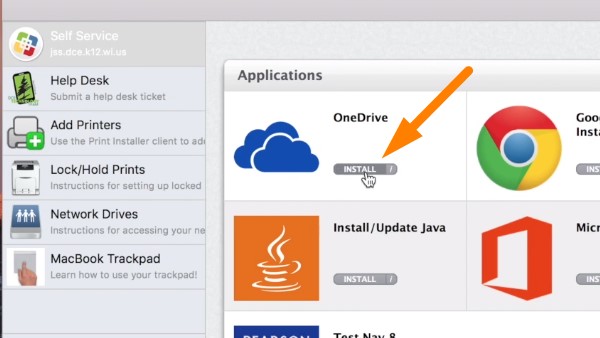
2. Launch OneDrive and sign in with your Microsoft credentials
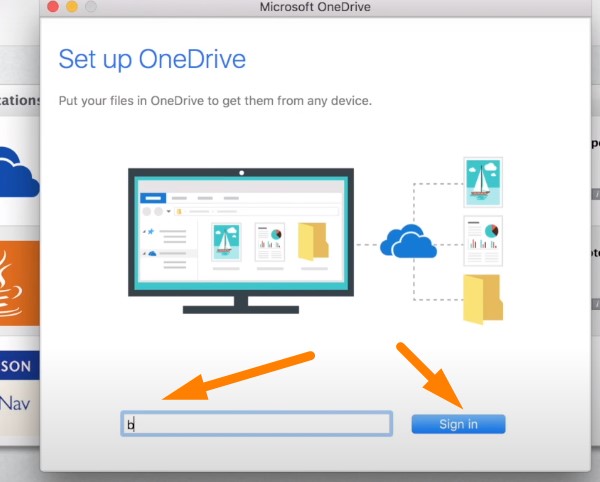
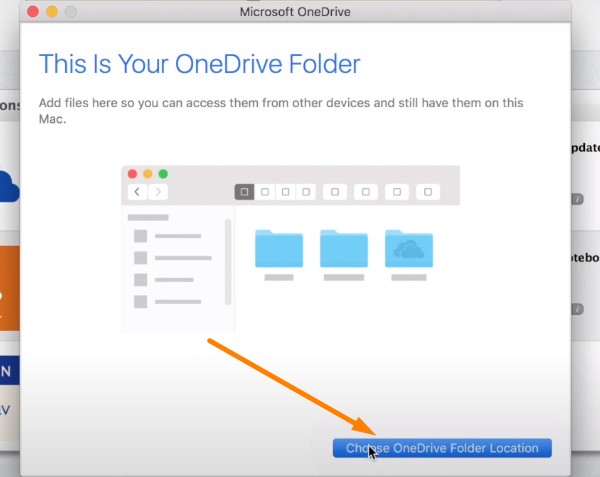
3. Click Choose OneDrive Folder Location
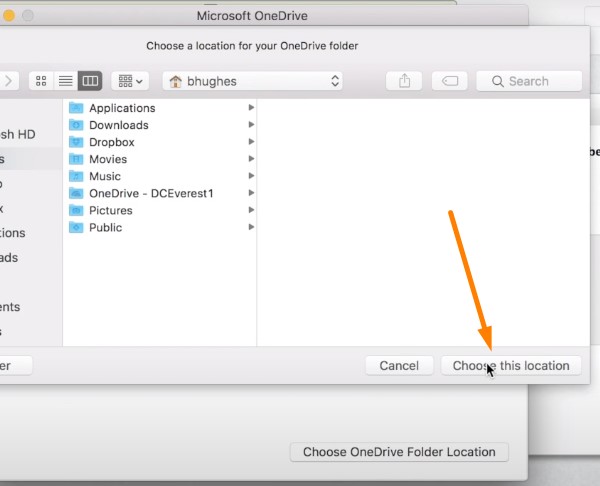
4. Choose a place where you’d like to place your app
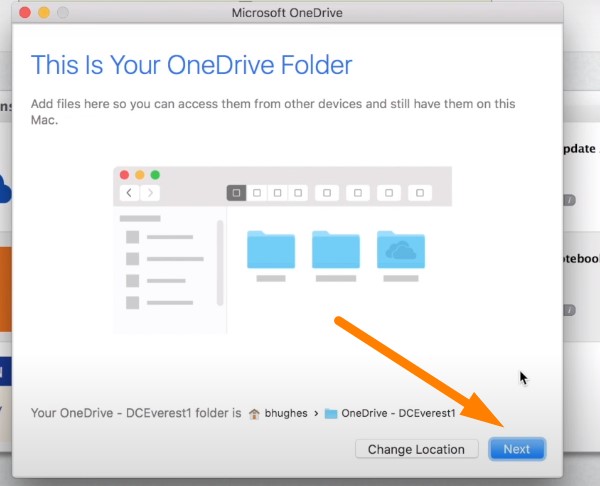
5. Follow the prompts and hit Next button
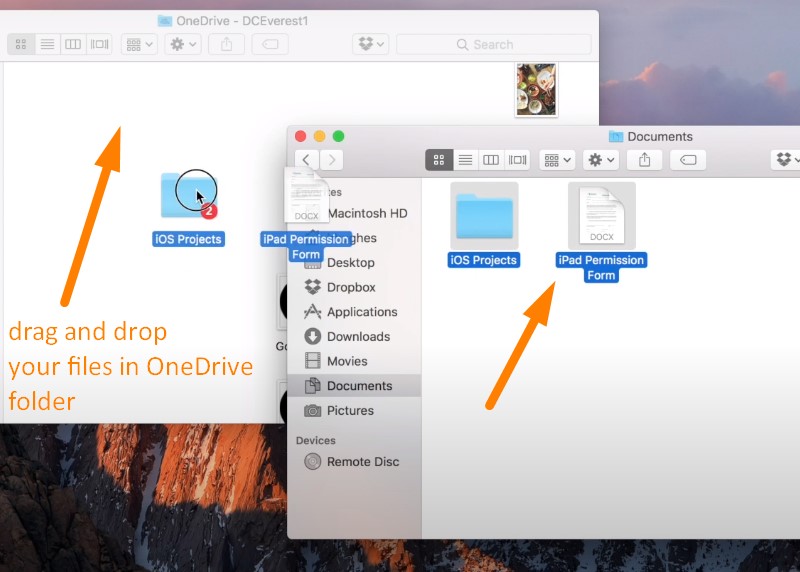
You should see the following screen to make sure everything is ready [to enter the folder, push “Open my OneDrive…”]:
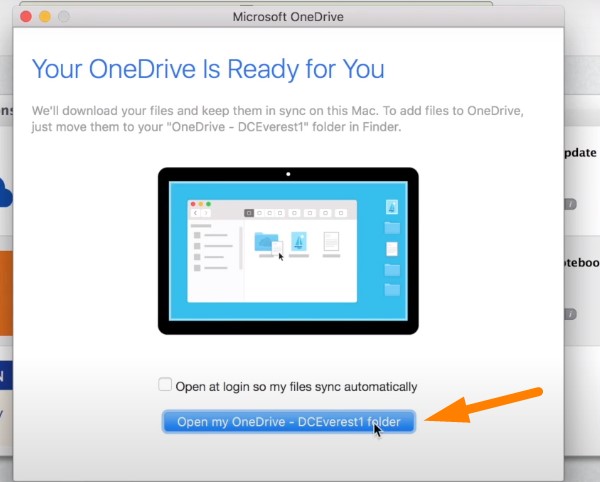
Within the OneDrive folder, you’ll find Documents, Pictures, Attachments, and Public. You may add any other folders or files here by dragging and dropping them and reorganizing them as you please.
The app runs as a menu-bar item, which settings you can adjust by selecting the app and clicking on the three-dots More button.
How to create a bootable backup for Mac
For the purposes of this article, we’ll use Paragon Backup and Restore utility to create a bootable Mac backup. However, you can use any other competitive software [more about Paragon B&R software and other solutions later in this article under Mac Backup Software Listing 2020]. For information on how to create a bootable clone of your Mac, see a section on cloning.
This following steps briefly outline how to restore the system APFS container:
- Download the utility at https://www.paragon-software.com/backup-recovery/
- Install and go through the product tour
- Create a bootable USB flash drive
- Make a backup from the APFS container to a file (saved on the second partition of the bootable flash drive)
- Choose a backup source [APFS container] and click Select → Choose a backup destination → Select what you want to backup and where → Checkbox Encrypt Backup and enter password → Click backup now → Click Restart now
- While rebooting the system hold Alt;
- Select the newly created USB flash drive to load → Select Paragon application from the menu → Select Restore (to the same disk from which the backup was taken!)
- Wait until the process is finished and reboot → the system is loaded and restored
Cloning method: back up your Mac to an external hard drive
Another method of backing up your Mac involves cloning your Mac to an external HDD. Drives need to be as large as your primary disk or larger (preferably larger, of course).
A clone of your disk is an exact copy bit-by-bit.
Cloning your Mac makes sense if you’re creating a full backup, migrating to a new Mac, or upgrading to an SSD.
Cloning is not backing up though, there are a few key differences:
- When you’re backing up to an external HDD or cloud, you’re creating a duplicate of your files, which cannot function on their own;
- A cloned drive, on the other hand, is the exact copy of your primary disk and is completely bootable.
Multiple cloning software exists on the market that can help you clone your Mac, among which are Carbon Copy Cloner, SuperDuper!, or Paragon Drive Copy.
However, you may use a built-in clone utility Disk Utility Tool to perform the same function. It’s not a prerequisite to update your macOS for this operation, but we recommend keeping it current regardless.
There are a few definitions we will use throughout this section:
- Your source is the drive you want to clone;
- Your destination is the drive where your clone will end up.
Follow the steps outlined below:
- Access the Recovery HD by booting your Mac and immediately pressing CMD + R keys;
- Once the Recovery loads, click the Disk Utility option from MacOS Utilities pop-up window → click Continue;
- On the left-hand side of the next screen, select your external drive as a destination, then click Erase button on top of the screen → under the “Format Drop Down Menu” select the Mac OS Extended (Journaled) as the Format Type → click Erase [this will clean the disk and prepare it for cloning, the process might take a while; when done, rename your external HDD by clicking on its name if it doesn’t yet have it];
- Select external HDD one more time on the left-hand side of the screen → in the Disk Utility menu bar select Edit → Restore → when prompted select the internal drive you want to clone → click Restore [this may take a while];
- From the Disk Utility menu bar, click on the Apple icon on the far left and choose Startup Disk → select your startup Disk when prompted and hit Restart.
Top 5 backup Mac software solutions
Paragon Open Cloud Backup Platform with a PCB SDK
Paragon Open Cloud Backup is a backup engine designed for service providers to create a secure backup solution with ease (either managed by Paragon’s backend or integrated with your backend).
By using Paragon OCB you will get access to a full range of features and tools to create your own scalable backup solution.
This is what you get within OCB:
- An out-of-box Paragon Cloud Backup solution
- Tools to build your own backup, such as
- Backup model framework
- Load forecasts reports
- Local agents’ bundle
- Cloud storage access
- Documents, instructions [developer guides and API documentation]
Paragon Backup & Recovery
Another solution that is offered by Paragon is a Backup & Recovery Utility, which has the following functionality:
- Full range of backup and restore solutions;
- Scenario-based backup jobs;
- macOS x (as well as any other OS) restore on new hardware platforms;
- Reliable recovery of individual files and entire systems.
With the Paragon Backup & Recovery utility, you can create all types of backups like a system image, incremental, differential, and file backups; run backups in manual mode or schedule reliable backup tasks and automate backup routines; rebuild entire disks and partitions, as well as restore individual folders, files, and application-specific data.
The community edition is available for free; business edition is available from $99.
SuperDuper!
SuperDuper, dubbed as the “heroic system for mere mortals,” creates a bootable clone of the startup drive, the functionality which is available in the free version of the software. In case you want to benefit from additional features, which are described below, then you have to purchase the license.
Additional features include:
- Scheduling;
- Smart updates;
- Sandboxes;
Price: Free or $27.95
Backblaze
In case you care about not only backing up but also safeguarding your data, then Backblaze might be an optimal backup solution for you.
Backblaze offers personal and business backup solutions, as well as B2 cloud storage.
Speaking of personal backups, this is a set of Backblaze features:
- Unlimited online backups;
- An easy restore and access (there is an option to have a 256 GB flash drive ($99) FedEx to you or an external drive up to 8 TB ($189));
- Safety of data (All data is stored in Backblaze secure data centers with biometric security and redundant power) via personal keys, encryption, and two-factor authentication;
- Automatic or scheduled backups;
- Location of a missing or stolen computer;
- Auto threading & throttling or set your own upload limit
Prices start from $6.
iDrive
iDrive is similar to BackBlaze in functionality but comes with a free tier that allows you to backup data of 5GB at no cost across your multiple Mac systems.
Unlike many other similar solutions, iDrive doesn’t delete the backup files after 30 days: you can restore any file at any point in time.
Here’s a list of iDrive features:
- Multiple device backup [unlimited PCs, Macs, iPhones, iPads and Android devices into a single account];
- Online file sync;
- Physical storage shipment;
- Snapshots and versioning;
- Web-based console for backup management;
- Sector-level backup or file-level backup;
- Encryption;
- Incremental and compressed backups;
- Smart backup [backing up only modified parts of files];
Price: Free or from $52.12
Carbon Copy Cloner
Carbon Copy Cloner (CCC) is perhaps one of the finest bootable backup solutions for Mac that’s currently available on the market.
CCC takes a complete backup of your Mac, an exact copy of Mac’s internal drive through a bootable drive, within a few clicks thanks to its user-friendly interface.
Here’s a list of features:
- Bootable backups;
- Smart updates [updating only files that have been added or modified];
- Backups anywhere [external HDD, another Mac];
- Snapshot support [only bootable backup solution that has full support for snapshots on Apple’s new APFS file system];
- Task grouping, sorting, scheduling, and history;
- Backup notifications;
- Clone Recovery HD;
- A set of advanced features, including file filtering, remote setup, history trends, and backup health check, among others.
Prices from $39.99.
If you have found a spelling error, please, notify us by selecting that text and pressing Ctrl+Enter.
Leave a Comment